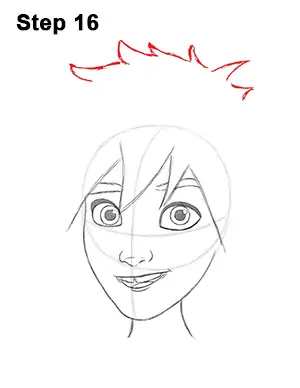
Step 16: Now draw the top part of Hiro's hair. Hiro has a thick head of hair, so draw the top part of the hair way up above the eyes. Pay attention to the distance between the top edge of the main circle and the top of the hair. The shape of the top of the hair should consist of a bunch of curved, spiky clumps of hair.
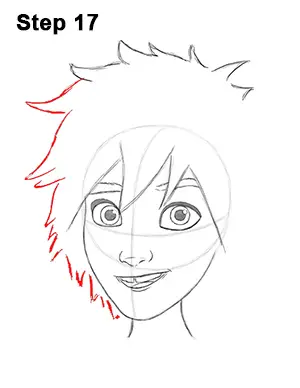
Step 17: Add the left side of Hiro's hair using more curved, spiky lines. Don't draw this side of the hair too far away from the side of the face. It should come down very close to his cheek.
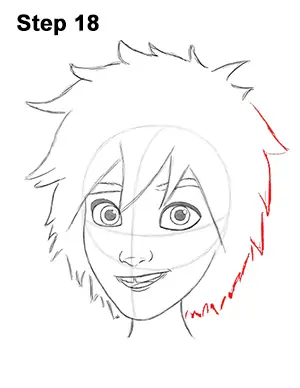
Step 18: Draw the right side of Hiro's hair the same way. Use a series of curved, spiky lines to represent the clumps of hair. This side of the hair should be a little farther away from his face because of the way his head is turned.
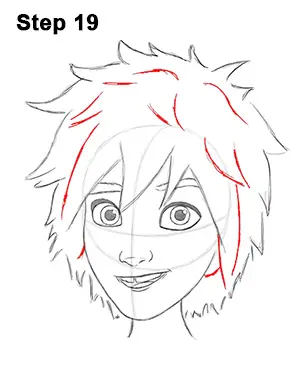
Step 19: Add a few more curved lines within the shape of Hiro's hair to give the hair more detail and volume. Draw the lines long, keeping in mind the way the hair moves down in big clumps.
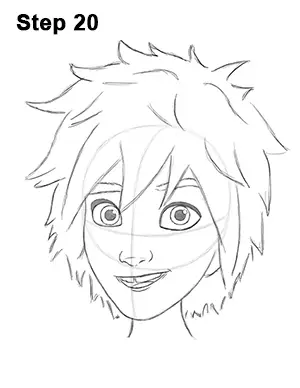
Step 20: That’s it! You now have a nice sketch of Hiro from Disney's Big Hero 6. You can stop at this quick drawing for a rough, sketchy look or go for a more finished look by continuing to the next step.


