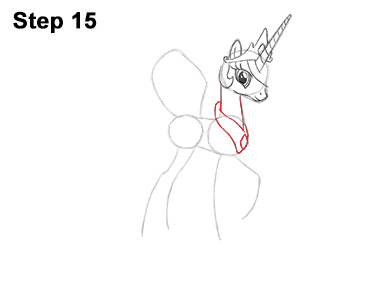
Step 15: Draw a wavy line from the back of the neck to the front of the body for the bottom of the collar. Add a small diamond on the right for the jewel in the collar. Draw another wavy line for the top of the collar and darken the lines for the neck.
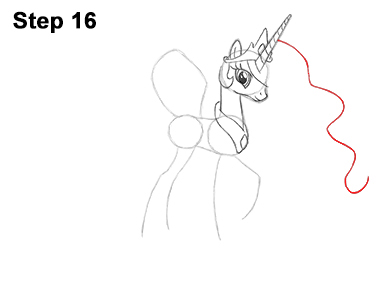
Step 16: Draw a line that starts at the horn for the first part of the mane. Make this line wavy to give the mane a flowing effect. The longer you make this line, the longer the mane will be.
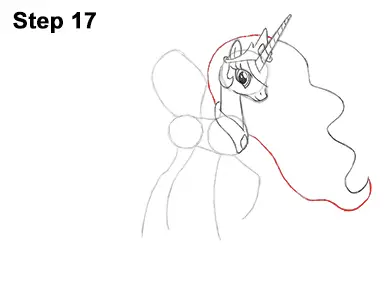
Step 17: Use another wavy line for the bottom part of the mane. Sketch these lines lightly at first and only darken them when you like their shape. Draw a curved line to the left of the head for the back portion of the mane.
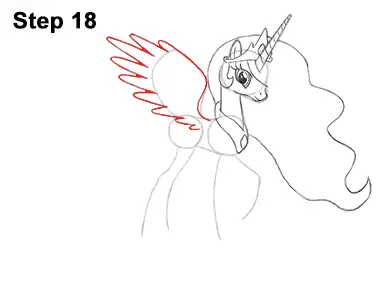
Step 18: Use the initial shape on the back as a guide to draw the wing. Draw a series of long, thin, curved lines for the individual feathers. The feathers should start at the edge of the initial guide line. Follow the path of the guide as you draw the feathers. The feathers should get smaller the closer they are to the bottom.
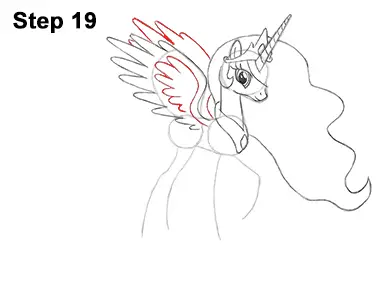
Step 19: Inside the wing, draw more feathers using curved lines. These feathers closely resemble the outer shape of the wing but smaller. Draw a few more curved lines on top for the feathers of the wing on the other side. Try not to overlap the lines of the wings.


