How to Draw Princess Celestia (My Little Pony)
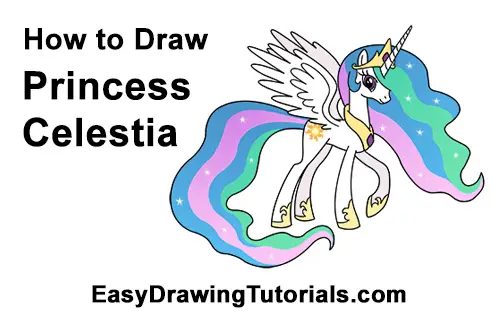
Use the video and step-by-step drawing instructions below to learn how to draw Princess Celestia from My Little Pony. A new cartoon drawing tutorial is uploaded every week, so stay tooned!
The speed drawing video:
The written step-by-step video tutorial:
Intro: Start off with a pencil sketch. In the beginning stages, don’t press down too hard. Use light, smooth strokes for sketching.
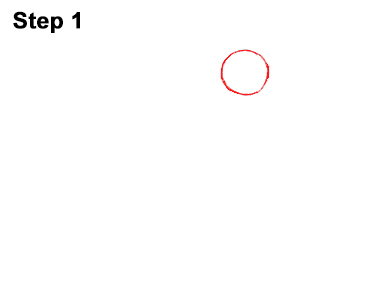
Step 1: Draw a small circle on the top, right side as a guide for Princess Celestia's head. First draw some marks for the height and width of the circle, then connect the marks using curved lines. Sketch it out lightly at first, then darken the lines when you get it right. Don't worry if the circle isn't perfect. It's just a guide. If you would still like a perfect circle, you can just trace the edge of a coin or anything circular.
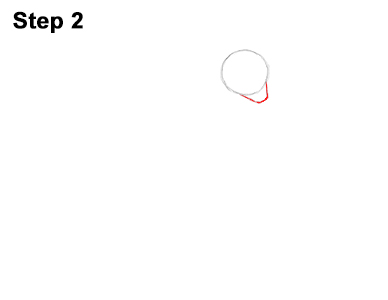
Step 2: Draw a small arc on the lower, right side of the head as a guide for the muzzle. The tip of the muzzle should be a little flat.
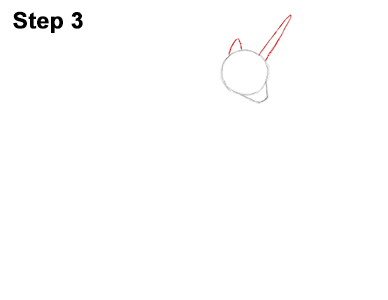
Step 3: On the top, left side of the head, draw a small, triangle- like shape as a guide for the ear. Add a longer, thinner, triangle-like shape on the right side as a guide for the horn.
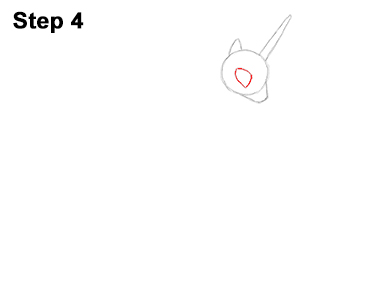
Step 4: Inside the head, near the middle, draw a guide for the eye. The shape should be similar to a triangle with curved sides. The bottom part of the "triangle" should face the lower, left side of the head.
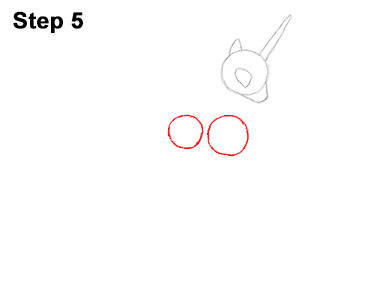
Step 5: Draw a small circle under the head as a guide for the front part of the body. Don't place the circle too far below the head, otherwise she'll end up with a long neck. Add another circle on the left for the back portion of the body. The circle on the left should be smaller than the one on the right.
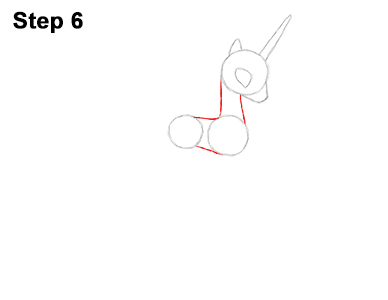
Step 6: Draw two lines that connect the head to the body to form the neck. Add two more lines to connect the bottom circles and form the torso.
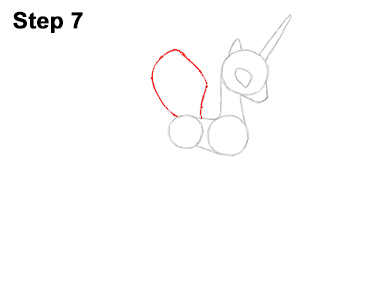
Step 7: Draw a curved line on top of the body as a guide for the wing. First draw two short vertical lines for the base, then a curved line above for the top of the wing.
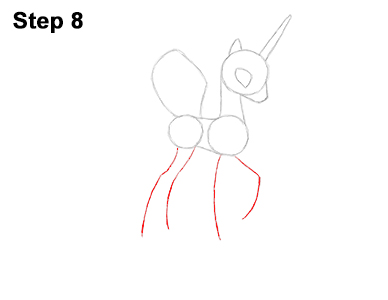
Step 8: Draw four long lines under the body as guides for the legs. Bend the leg on the right to indicate a raised leg. Draw two legs under each circle. The hind legs extend back a bit. Bend the hind legs slightly near the middle to indicate the joints.
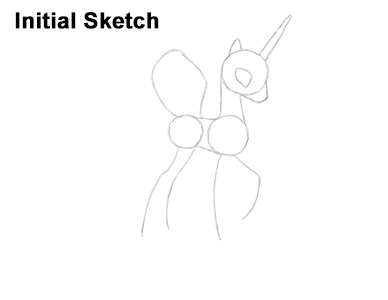
That's it for the guides! For the next steps, use darker lines for a more finished drawing.
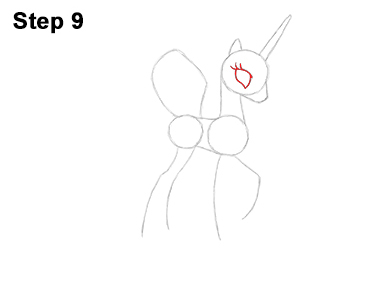
Step 9: Darken the shape of the eye by first using a thick line for the top. The ends of this line should curl a bit and extend outside of the initial shape. Add a couple more curved lines on top for the eyelashes. Darken the sides and bottom of the eye as well to indicate the thick eyelashes. Bend the bottom line as you darken it for a more square-like shape.
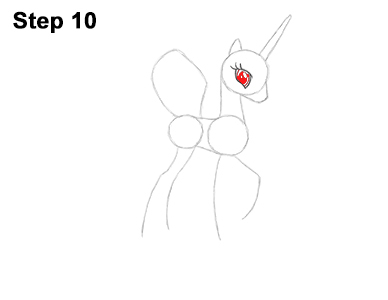
Step 10: Inside the eye, draw two vertical lines for the iris. Draw a small oval inside the iris for the pupil. Shade in the oval except for two tiny circles inside that represent glare.
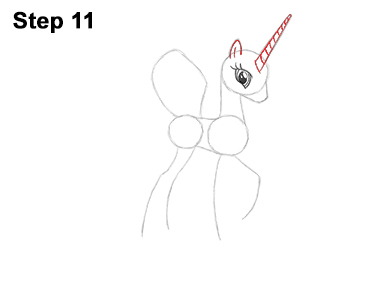
Step 11: Darken the small triangle- like shape on the head and add a line inside it to create the ear. Darken the long, thin shape on the right to create the horn. Add a series of short lines inside the horn to give it a swirly texture.
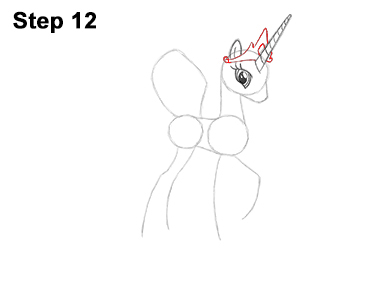
Step 12: Draw a curved line above the eye for the base of the crown. The crown will sit behind the horn, so try not to overlap the lines. Add a couple of pointy spikes at the top for the tips of the crown. Draw a small diamond in the crown for the jewel.
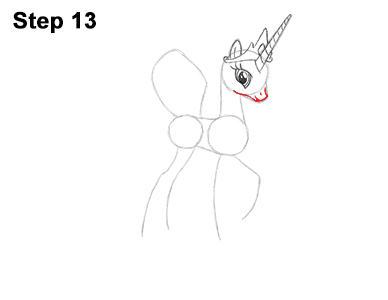
Step 13: Follow the path of the initial arc to create the shape of the muzzle. Curl the sides more as you darken the lines for the muzzle. Draw a small line at the tip for the mouth and a smaller line above it for the nostril.
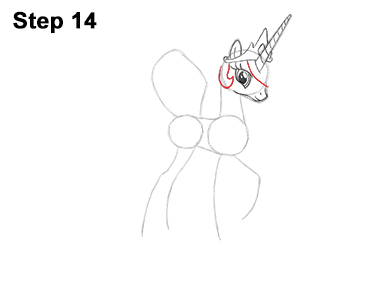
Step 14: Draw a curved line under the horn for the front part of the mane. Add a curved shape to the left of the eye for that curly part of the mane.
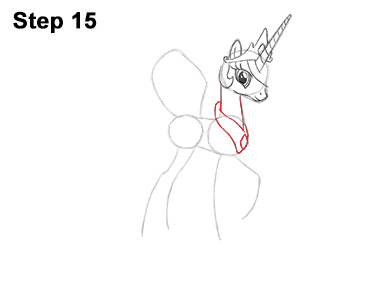
Step 15: Draw a wavy line from the back of the neck to the front of the body for the bottom of the collar. Add a small diamond on the right for the jewel in the collar. Draw another wavy line for the top of the collar and darken the lines for the neck.
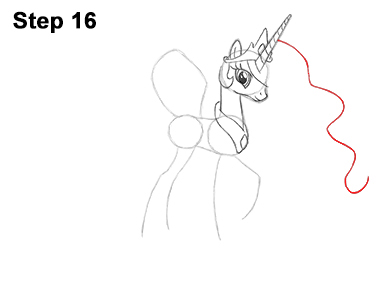
Step 16: Draw a line that starts at the horn for the first part of the mane. Make this line wavy to give the mane a flowing effect. The longer you make this line, the longer the mane will be.
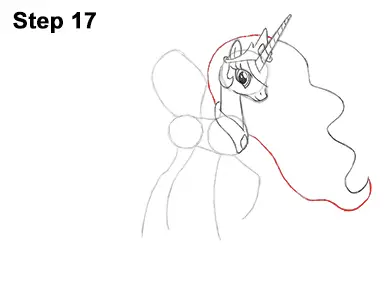
Step 17: Use another wavy line for the bottom part of the mane. Sketch these lines lightly at first and only darken them when you like their shape. Draw a curved line to the left of the head for the back portion of the mane.
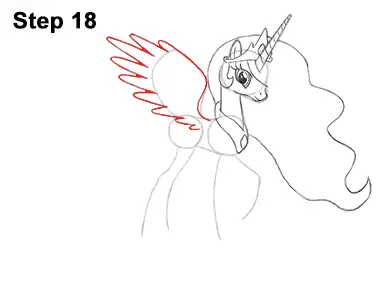
Step 18: Use the initial shape on the back as a guide to draw the wing. Draw a series of long, thin, curved lines for the individual feathers. The feathers should start at the edge of the initial guide line. Follow the path of the guide as you draw the feathers. The feathers should get smaller the closer they are to the bottom.
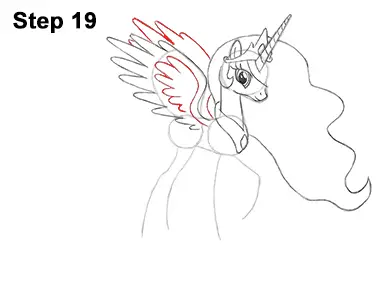
Step 19: Inside the wing, draw more feathers using curved lines. These feathers closely resemble the outer shape of the wing but smaller. Draw a few more curved lines on top for the feathers of the wing on the other side. Try not to overlap the lines of the wings.
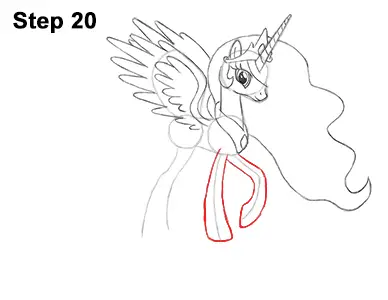
Step 20: Use the long lines on the right as guides to draw the front legs. Follow the basic path of the guide as you make the shape of the leg thicker. The bottom of the leg should be wider than the top. Sketch the legs lightly at first to get the structure right. Follow the path of the guide. When you get the shape right, darken the lines.
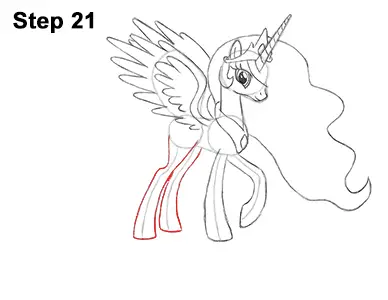
Step 21: Use the lines on the left as guides to draw the hind legs. Add a small bump on the left side, near the middle, to indicate the leg's joint. Part of the hind leg on the other side is hidden, so only draw the visible portion. The hind legs should be wide at the top and bottom but skinny near the middle.
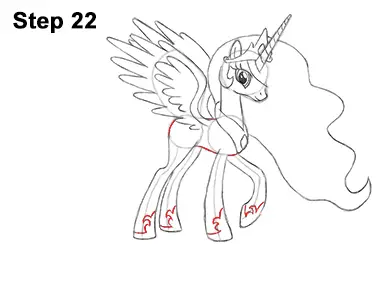
Step 22: Darken the rest of the guides to create the shape of the body. Also add the hooves at the tip of each leg using a series of small curved lines. The shape of the hooves is similar to a fleur-de-lis. Use the image above as reference to get the shape of the hooves right.
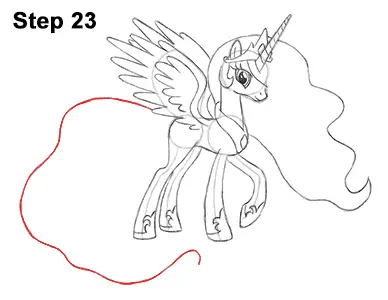
Step 23: Draw a long line to the left of the body for the top part of the tail. Make the line wavy for a flowing effect. Make the line longer for a longer tail.
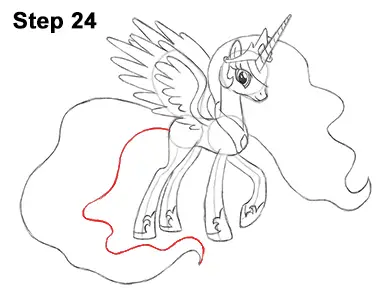
Step 24: Draw another wavy line for the bottom of the tail. Sketch lightly at first. Only darken the line when you get the shape right. The tip of the tail should wrap under the legs.
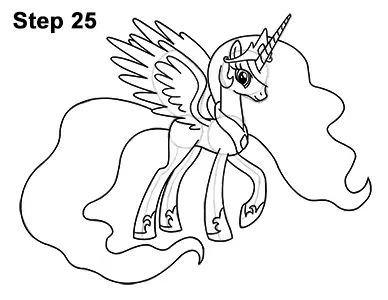
Step 25: Carefully go over the final sketch lines with a pen or marker.
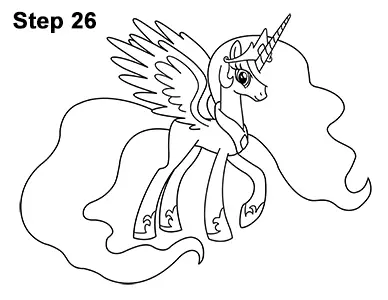
Step 26: When the ink dries, erase all the pencil marks.
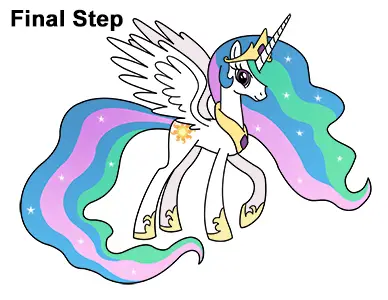
Final Step: Color your drawing using color pencils, markers or even crayons! The cutie mark is made up of a yellow circle with eight wavy rays around it. The jewels and her eyes are purple. The crown, collar and hooves are yellow-orange.
Add the blue outline to the mane and tail. Start coloring the blue section s of the mane and tail. As you color, leave a few diamond- like shapes blank for the sparkle. Use blue-green for the other sections of the mane and tail. Remember to leave a few diamond shapes blank for sparkle. Finish the mane and tail by coloring the last section pink. Use gray for the wing and legs on the other side of the body.
Thanks for visiting! Subscribe to the EasyDrawingTutorials YouTube Channel for a new tutorial every Sunday.
To learn how to draw animals, visit How2DrawAnimals.com.


