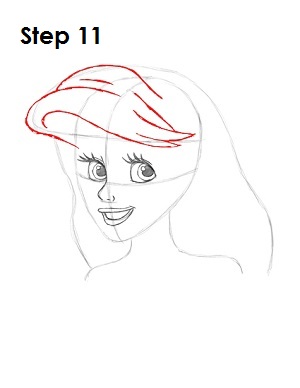
Step 11: Ariel's hair is tricky, so it’s divided into two parts. First, tighten in her bangs by using the shape created earlier and drawing in a series of rounded hills on the left and a few spikes for the ends of her hair on the right.
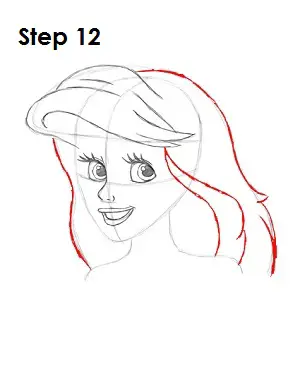
Step 12: Now using the guides created earlier, draw in a series of curved lines on the right side of Ariel's head to represent her flowing red hair. On the left side, just darken in the original guide.
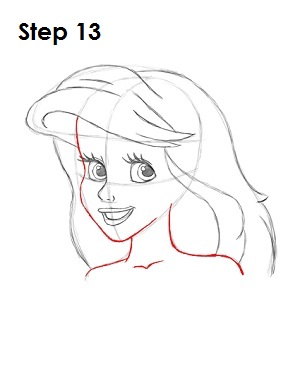
Step 13: Tighten the shape of Ariel's face by using the egg shape as a guide. Be sure to curve the shape in where her eye is to create her cheek. Darken in her neck and shoulders and draw a line in the shape of the letter V below Ariel's neck to represent her collarbone.
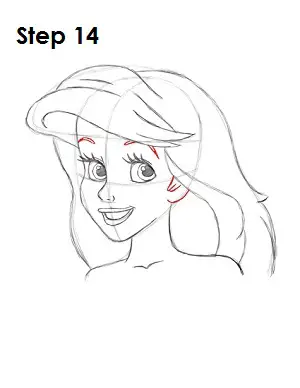
Step 14: Draw in Ariel's eyebrows as curved lines above her eyes right below her bangs. Part of the right eyebrow is being hidden by her long bangs. Draw in the bottom part of this Disney princess' ear and sideburn, which are also being hidden by her hair.
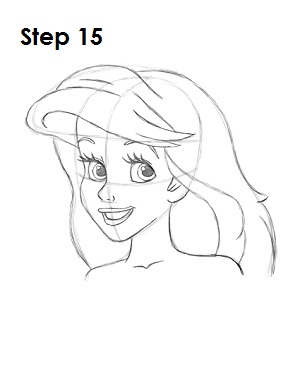
Step 15: That’s it! You now have a nice sketch of Ariel from Disney's The Little Mermaid. You can stop at this quick drawing for a rough, sketchy look or go for a more finished look by continuing to the step below.


