
Use the video and step-by-step drawing instructions below to learn how to draw The Simpsons character Homer Simpson. A new cartoon drawing tutorial is uploaded every week, so stay tooned!
Intro: When learning how to draw this The Simpsons character, start with a pencil sketch. In the beginning stages, don't press down too hard. Use light, smooth strokes for sketching.
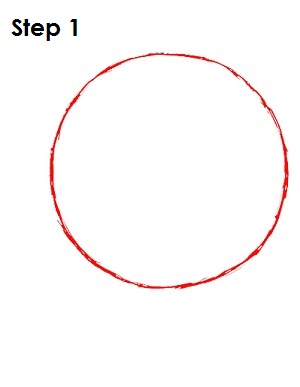
Step 1: To draw Homer Simpson, start by drawing a huge circle that takes up most of the page's space. Draw it closer to the right edge of the paper. This circle will more or less be Homer's head.
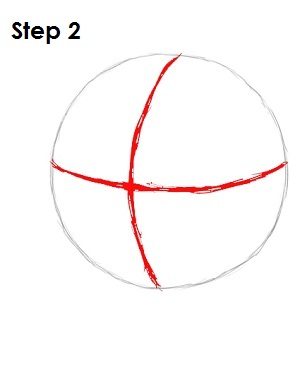
Step 2: Next draw two intersecting lines across the circle. When drawing the lines, bend them so they follow the contour shape of a sphere. Draw the horizontal line in the middle, but draw the vertical one just to the left of the middle. These will be construction lines that will help you place Homer Simpson's features later on.
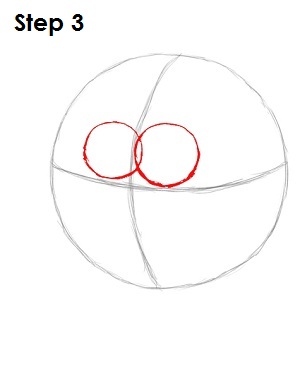
Step 3: Draw a small circle just to the right of the vertical construction line and above the horizontal construction line. This will be Homer Simpson's right eye. Draw another circle about the same size to the left, and make it slightly overlap the first circle, like a Venn diagram. This will be Homer's left eye.
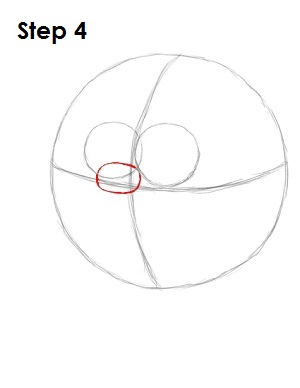
Step 4: Draw an oval below the left eye to make Homer Simpson's nose. Draw the oval so it starts where the two eyes meet. Extend the oval through the left eye and below the horizontal construction line.
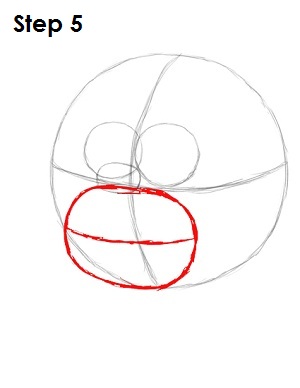
Step 5: Now draw an even bigger oval that starts where the original construction lines meet. The oval will extend to the bottom of the main circle, and it will come out from it slightly on the lower left-hand side. Draw a horizontal construction line to divide the oval in half. You've just learned how to draw Homer Simpson's face guides.


