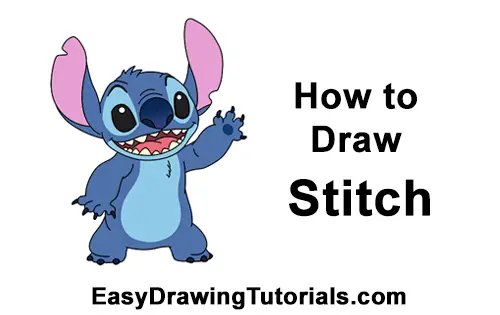
Use the super easy step-by-step instructions below to learn how to draw Stitch from the Disney movie Lilo & Stitch. Follow along with the video, or use the images in this article. By the end of this tutorial, even beginners will have a completed drawing of Stitch!
Love drawing? Keep your artistic streak going and stay tooned for more free art lessons by:
- Bookmarking the EasyDrawingTutorials.com homepage for updates
- Subscribing to the EasyDrawingTutorials YouTube channel
- Visiting How2DrawAnimals.com for free animal tutorials
All the free art lessons on EasyDrawingTutorials.com are easy to follow; they teach you the basics while showing you how to create fun cartoons step by step. Each tutorial has a video tutorial option, as well as step-by-step photos and written text to follow. After you're done here, try another tutorial!
RELATED TUTORIALS
 |
 |
 |
 |
 |
To draw Stitch step by step, follow along with the video tutorial below and pause the video whenever you need to. You may find it easier to follow the images and text below. The new lines are shown in red, and tips are explained. You may want to open the video in a new tab and use both drawing methods! Take your time and work at your own pace. You can even take breaks and come back to where you left off!
Start with Simple Lines and Shapes
Intro: Start off with a pencil sketch. In the beginning stages, don’t press down too hard. Use light, smooth strokes for sketching so that it's easy to erase if you make a mistake.
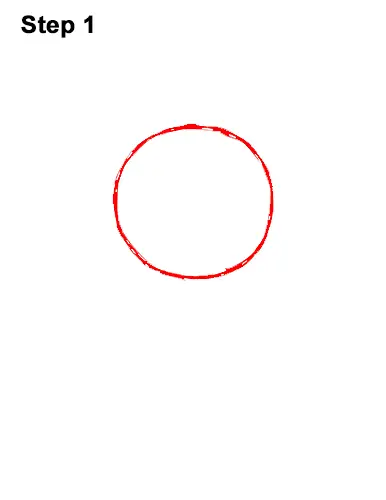
Step 1: Draw a big circle near the top of your paper as a guide for Stitch's head. First make four small marks to indicate the circle's height and width. Then connect the marks using curved lines. Sketch lightly at first so that it's easy to erase if you make mistake. If you're struggling with making the circle, trace the outer rim of a cup, a lid or any other object with a circular edge.
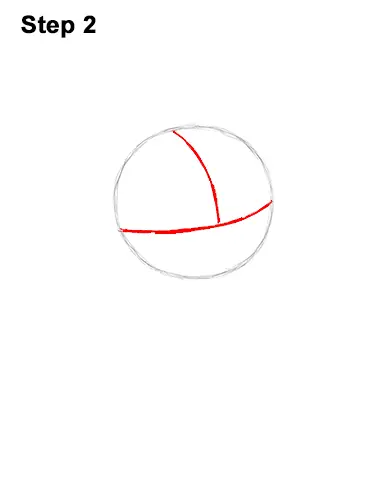
Step 2: Inside the circle, make a curved, horizontal line to help you place Stitch's facial features later. On top of the horizontal line, draw a curved, vertical line for another construction line.
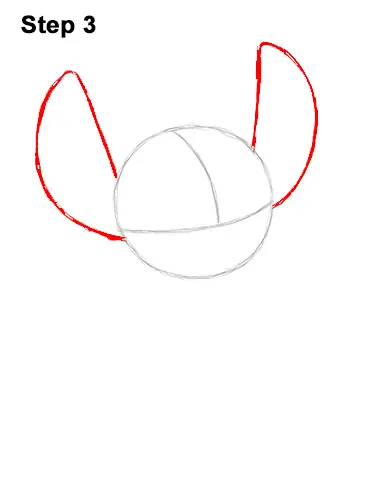
Step 3: Add the guides for Stitch's ears by first drawing two vertical lines on top of the head. Pay attention to the length of these lines in relation to the circle. On the left side, use your pencil to make a long line that curves out and down and meets the circle at the bottom. Add a similar curved line on the right side to complete the guides for the ears.
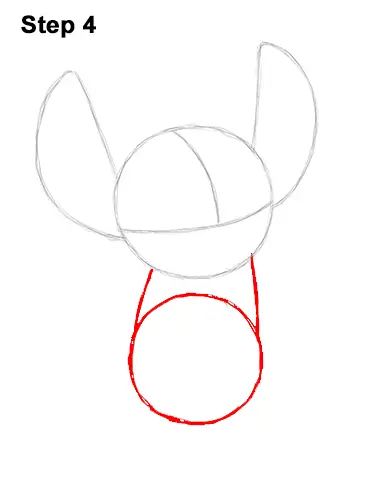
Step 4: Under the head, add another circle the same way as the first, as a guide for the body. Draw four small marks to determine the size of the circle, then connect the marks using curved lines. This circle should be slightly smaller than the circle for the head. Add a couple of lines that connect both circles to complete the guide for Stitch's body.
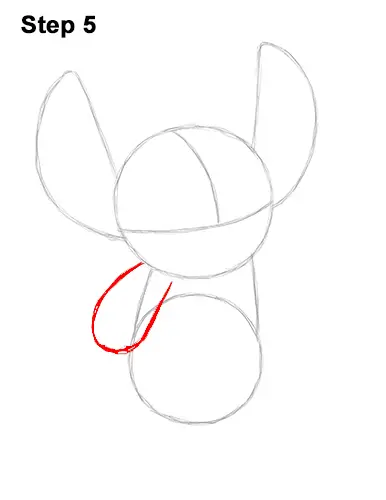
Step 5: Under the head, on the left side, draw a long, curved line, similar to a tilted letter U as a guide for Stitch's first arm.


