


Use the video and step-by-step drawing instructions below to learn how to draw Simba from The Lion King. A new drawing tutorial is uploaded every week, so stay "tooned"!
Thanks for visiting! Subscribe to the EasyDrawingTutorials YouTube Channel for a new tutorial every week.
To learn how to draw animals, visit How2DrawAnimals.com.
To learn how to draw Manga, visit How2DrawManga.com.
Stay "tooned" for more free drawing lessons by:
- Following our page on Facebook
- Subscribing to the EasyDrawingTutorials YouTube Channel
- Visiting How2DrawAnimals for free animal drawing tutorials
This page contains Amazon affiliate links. If you choose to purchase through these links, I earn a small commission at no extra cost to you.
RELATED TUTORIALS
 |
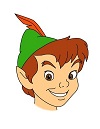 |
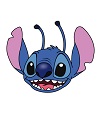 |
 |
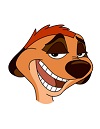 |
Materials You’ll Need
Before starting, gather these basic drawing supplies:
- Pencil (an HB lead pencil is best for light sketches)
- Eraser
- Black ink pen or marker
- Drawing paper
- Colored pencils or markers
Intro: Start off with a pencil sketch. In the beginning stages, don't press down too hard. Use light, smooth strokes for sketching.
Start with Simple Lines and Shapes

Step 1: Start drawing Simba by sketching a circle in the middle of the page. This will be the basic shape for Simba's head.
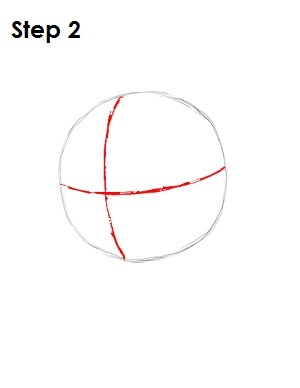
Step 2: Next draw a vertical line near the left side of the circle and a horizontal line near the middle of the circle. When drawing the lines, bend them so that they curve to the shape of the sphere. These will be construction lines that will help you place Simba's features later on.
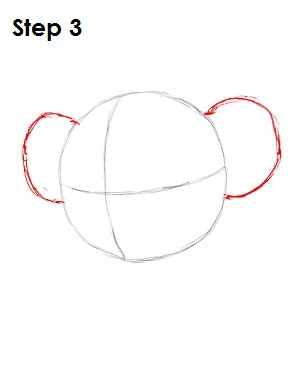
Step 3: Now draw a C-shaped curve on the top left side of Simba's head and a slightly bigger, backwards C-shaped curve on the other side of his head. These are the basic shapes for Simba's ears.
Keep Building the Drawing Slowly
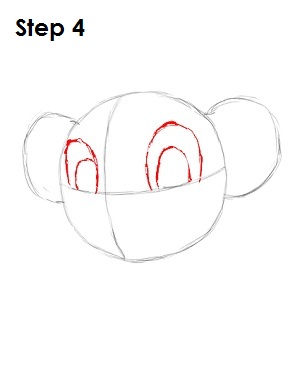
Step 4: On top of the horizontal construction line on the left side of the vertical line, draw a big upside-down U-shaped curve that grazes the main circle. Draw a similar but smaller curve inside of it. Do the same thing on the other side of the vertical construction line, but make the curves a bit bigger. These will be Simba's eyes.
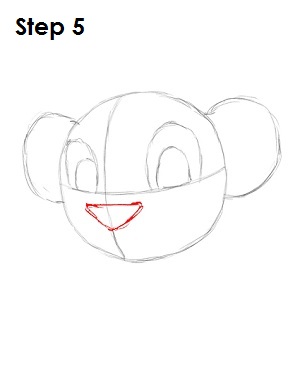
Step 5: Draw an upside-down triangle below the horizontal construction line to create Simba's nose.
Finish Up the "Skeleton"
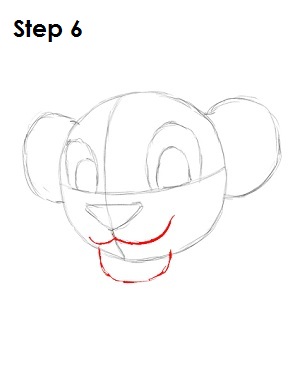
Step 6: Below Simba's nose draw two curves that start at the vertical construction line and go in opposite directions. Draw the curve on the right so it is bigger than the one on the left. This will be Simba's mouth. Draw an even bigger curve that sits below the main circle and his mouth. This will be Simba's chin.
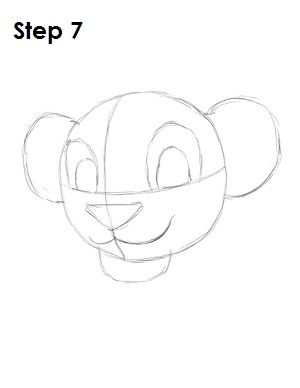
Step 7: You have the basic Simba shape, so now you will go in and tighten your drawing. From this point on, press harder with your pencil in order to get darker lines and a more defined sketch.
Now Add Details
Step 8: Tighten the shape of Simba's nose by making the triangle more round and dip it downward in the middle of the top part. Draw two curves inside the two lower sides to create his nostrils and two lines coming up out of the top corners. On top of Simba's nose, draw two small wrinkles.
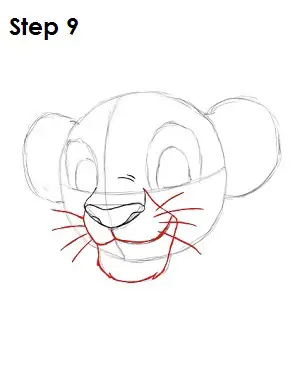
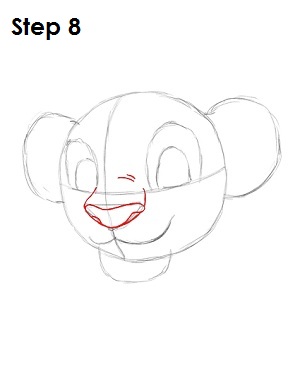
Step 9: Darken the shape of Simba's mouth, but draw it more jagged at the bottom part of his chin to represent his fur. Close the shape on the left and right sides to meet his nose. Draw four strokes on each side of Simba's mouth for his whiskers.
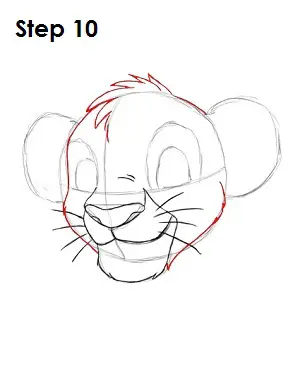
Step 10: Tighten the shape of Simba's head by giving him a few tufts of hair on top to represent his "mane." Taper in the left side of his face inward to the eye on the left. To give him his jaw on the left, make the line come out again, and then back in and down toward his mouth. Also draw in Simba's jaw on the right side. As you draw, make these lines a bit jagged to represent his fur.
Stay Patient and Keep Drawing - You're Almost There!
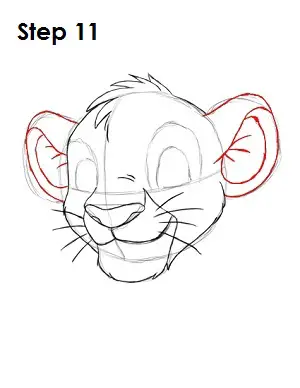
Step 11: Dip the top part of Simba's ears downward toward his head so they won't be so round. Draw a curved line below the tops of his ears to draw the top part of the inside of his ears. Draw a semicircle underneath these curved lines. Draw a few short lines within the semicircle to represent the insides of his ears. Again, make all of these lines a little jagged for his fur.
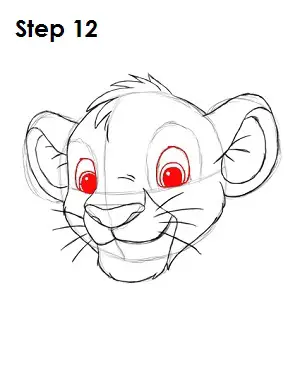
Step 12: Darken the shape of Simba's eyes, and draw two curves in each eye that are almost circles. These represent Simba's pupils.
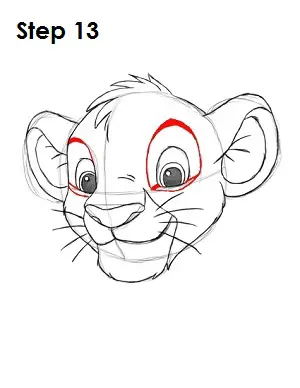
Step 13: Finish drawing the rest of Simba's eyes by giving him some eyebrows and darkening in parts of the shape that surrounds them. Draw two lines beneath each eye as well.
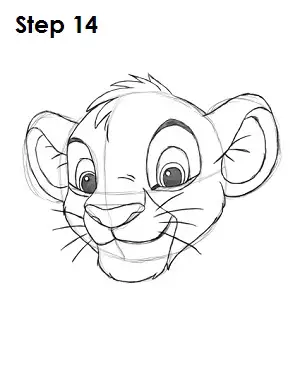
Step 14: You now have a nice sketch of Simba from The Lion King. You can stop at this quick drawing for a rough, sketchy look or go for a more finished look by continuing to the step below.
Now It's Time to Color
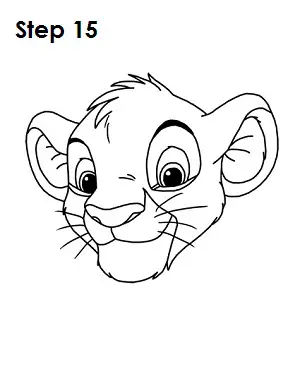
Step 15: For a more finished, inked look, carefully draw over the final sketch lines with a pen or marker. Wait for the ink to dry, and then get rid of every pencil mark with an eraser. You now have a finished inked drawing of Simba! You can stop here or go to the final step to complete your Simba drawing.
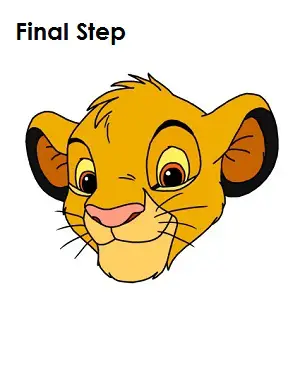
Final Step: For a completely finished Simba drawing, you have to color it. You can use markers, colored pencils or even crayons! Color Simba's head and top of his ears a dark yellow or light brown color, or simply mix yellow and brown. Use anything that looks good and comes close to his color. The insides of Simba's ears are a darker brown, and the outlines of the ears are black. His eyes are yellow, and his pupils are orange. His nose is pink, his nostrils are red, and his mouth is a light orange color. You now have a completed drawing of Simba from The Lion King.
RELATED TUTORIALS
|
|
|
|
|