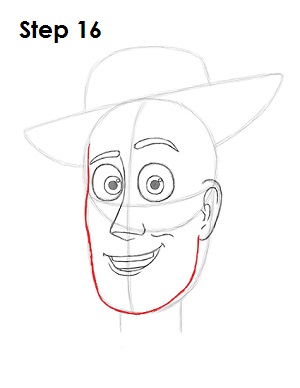
Step 16: Use the initial circle and U-shaped lines as guides to draw Woody's face. Follow the basic path of the guides as you darken the lines but make the shape a bit wavier.
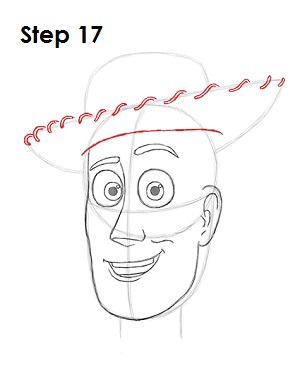
Step 17: Draw another long diagonal line above Woody's eyebrows for the hat's opening. Draw a series of tiny curved lines along the initial diagonal line for the design on the hat's brim. Don't overthink it, just add S-shaped lines along the path of the diagonal line.
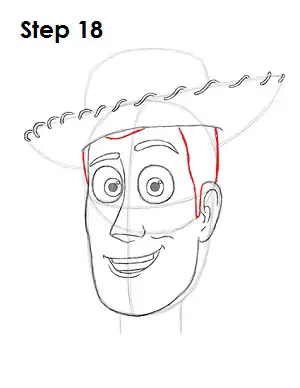
Step 18: Under the hat's opening, draw a few curved lines to indicate the hair. The line to the left of the ear should curve up to form Woody's sideburn.
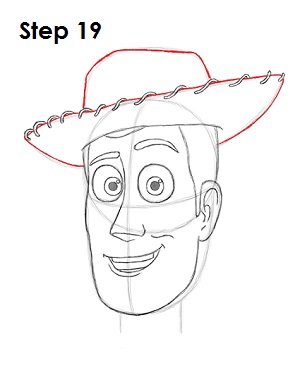
Step 19: Darken the initial lines to create the shape of Woody's hat. Simply follow the path of the guides and darken the lines. Don't overlap the small S-shaped line on the brim of the hat.
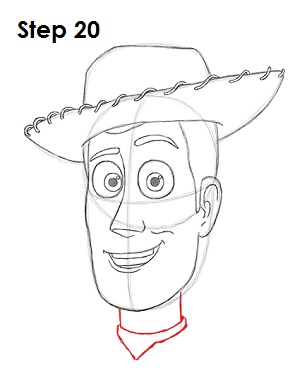
Step 20: Darken the lines under the head to create Woody's neck. Draw a curved line for the handkerchief and another V-shaped line for the shirt's opening.


