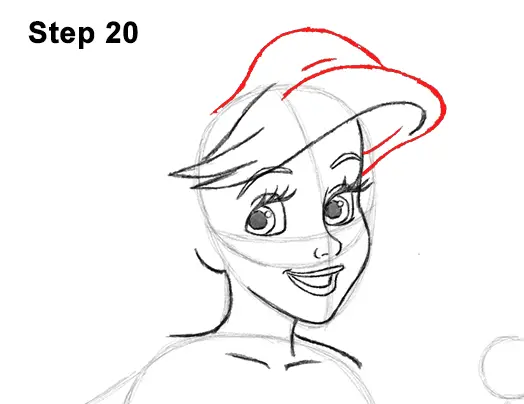
Step 20: Draw a series of lines above the head for the second part of the hair. The first curved line should be similar to a small hill high above Ariel's head. The second line should start below the first, and it should curve outward and end next to the eye on the right. Add a few short lines within the shape of the hair for extra detail.
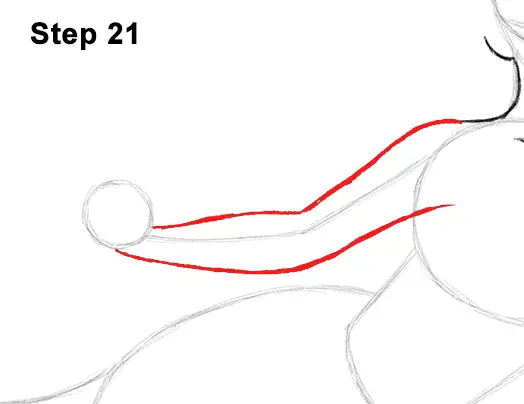
Step 21: Use the angled line on the left side of the body as a guide to draw Ariel's arm. Sketch lightly at first as you follow the basic path of the guide in order to get the shape right. The shape should be indented a bit near the middle to create the forearm, and the wrist should be thin.
When you get the shape of the arm right, darken the lines. Use light lines at first so they're easier to erase if you make a mistake. The line for the bottom part of the arm should continue toward the inside of The Little Mermaid's body just a little bit.
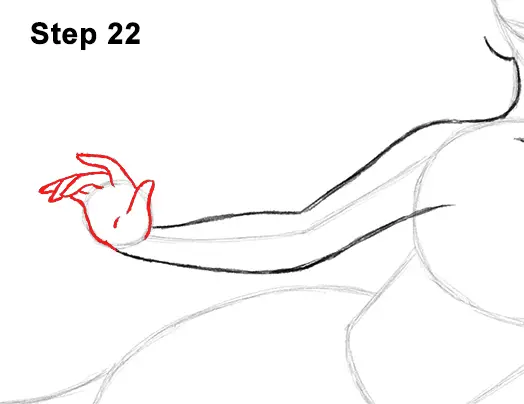
Step 22: Use the small circle as a basic guide to draw Ariel's hand and fingers. First draw a short, curved line on the top, right side of the circle for the thumb. The line should sort of be similar to a wavy upside-down letter U. To the left of that, lightly sketch a longer curved line for the index finger. Bend the shape a bit at the middle and make the tip pointy. When you get the shape of the finger right, darken the line. Hands can be a little tricky, so please pause the video to draw at your own pace.
Below the index finger, draw a similar shape for the middle finger but this time make it curve down a bit more. Ariel's ring finger is mostly behind the middle finger, so only draw the tip of it above the middle finger. Draw the the pinky the same way. Only draw the top part right above the ring finger. Now add a couple of short lines below the middle finger for the base of the ring finger and pinky. Extend the base of the pinky downward as you follow the shape of the initial circle to create the palm of the hand.
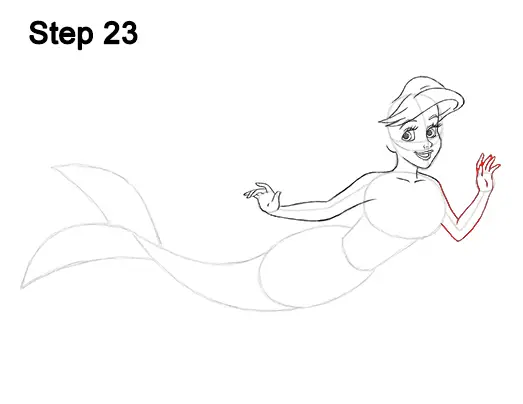
Step 23: Draw Ariel's arm and hand on the right side the same way. Sketch the shape of the arm lightly at first as you follow the basic path of the guide line. Make the arm thinner the closer it is to the hand to create the wrist. The forearm should be thicker. When you get the shape of the arm right, darken the line.
Use the small circle as a basic guide to draw Ariel's fingers. First draw the thumb as a small, curved line on the top, left side of the circle. Now draw the top part of the index finger above the thumb and make it curve slightly to the right. To the right of the index finger, draw two more similarly shaped lines for the middle and ring fingers. Draw a smaller, curved line on the top, right side of the initial circle for the pinky finger. Follow the basic path of the initial circle to finish drawing The Little Mermaid's hand and add a small line within the shape for extra detail.
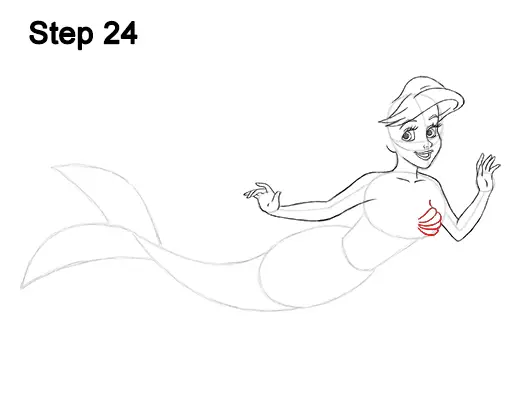
Step 24: Draw the right side of Ariel's seashell bra using a series of curved lines on the lower right side of the intial oval. This shape should start with a curved line at the top and then three more curved lines below it to form a scallop-like seashell. As you draw these lines, stay within the boundaries of the initial oval shape.


