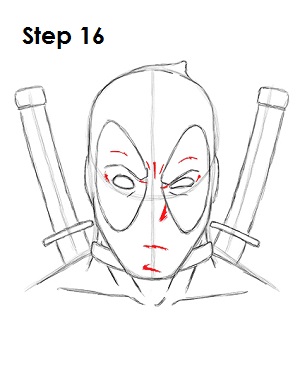
Step 16 (optional): You can stop here and continue to step 18 if you want a simpler drawing of Wade Wilson. You can draw a few lines throughout Deadpool's face to give him more detail. A few lines around his eyes accentuate his brow. Some under his eyes emphasize the shape of the nose and lips under the mask.
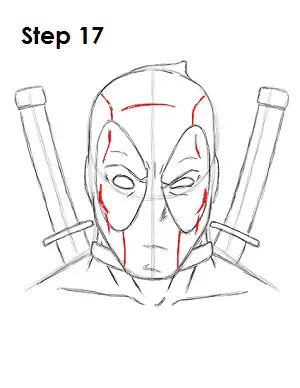
Step 17 (optional): You can add further detail if you'd like. A couple of vertical lines represent the mask's stitching. A few more lines create Deadpool's forehead and cheekbones under the mask.
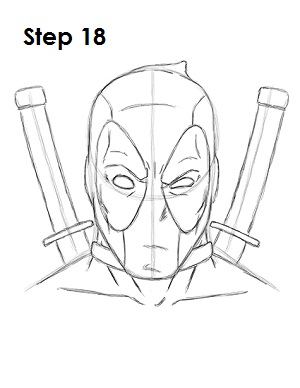
Step 18: That’s it! You now have a nice sketch of Deadpool. You can stop at this quick drawing for a rough, sketchy look or go for a more finished look by continuing to the step below.
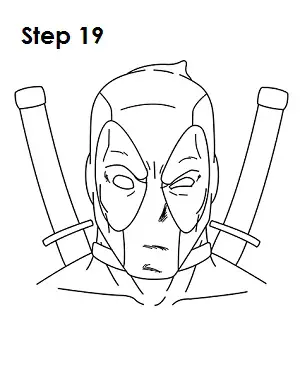
Step 19: For a more finished, inked look, carefully draw over the final sketch lines with a pen or marker. Wait for the ink to dry, and then get rid of every pencil mark with an eraser. You now have a finished inked drawing of Deadpool! You can stop here or go to the final step to complete your Deadpool drawing.
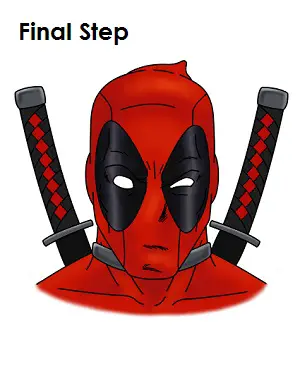
Final Step: For a completely finished Deadpool drawing, you have to color it. You can use markers, color pencils or even crayons! The pommel and guard on the katanas along with the collar around his neck are gray. The scabbards and hilts are black. You can add more detail to the hilts by adding little red diamonds across the middle to represent the wrappings. The main part of Deadpool's costume is red. The ovals around his eyes are black. If you'd like, you can leave a strip down the middle of each oval blank to represent shine. That’s it! You now have a completed drawing of the merc with a mouth, Deadpool, aka Wade Wilson, from Marvel.


