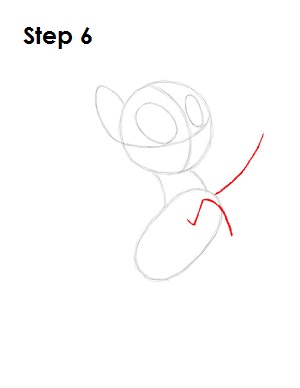
Step 6: On the top part of the torso, draw two lines as guides for Applejack's front feet. The top line should curve up toward the head. The bottom line should angle down. The angles of this line will determine where the joints will go later.
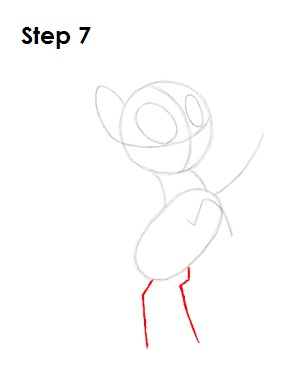
Step 7: Now draw two more lines at the bottom of the torso as guides for Applejack's hind legs. Be sure to angle the lines at the top. This will help you figure out the joints later on.
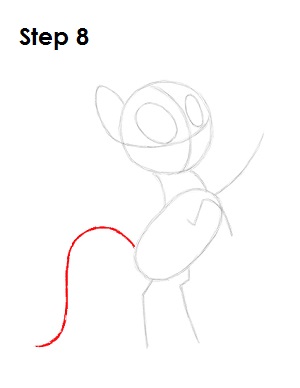
Step 8: Draw a long curved line on the bottom, left side of the torso as a guide for Applejack's long tail.
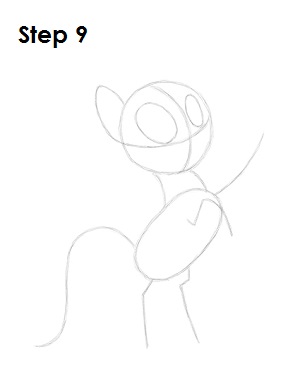
Step 9: That’s it for the initial sketch! You have the basic shape of Applejack from My Little Pony: Friendship Is Magic. Now go in and tighten your drawing. From this point on, press harder with your pencil in order to get darker lines and a more defined sketch.
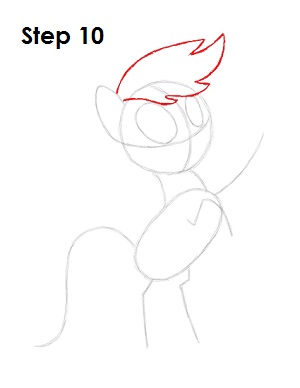
Step 10: Applejack's mane is tricky, so it's divided into a few parts. First draw the front part of the bangs as a series of curved lines on top of the head. The line for this shape starts at the ear, then moves to the left in a series of curved spikes, then goes over the eyes and ends at the ear again.


