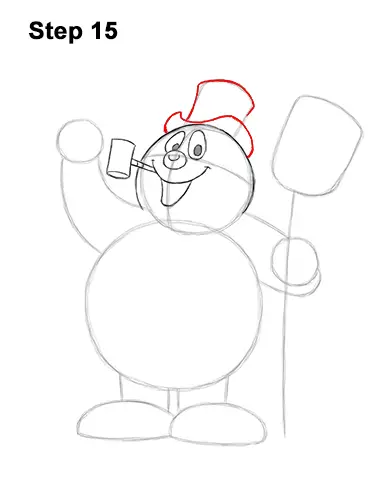
Step 15: On top of the head, draw a curved line for the hat's brim. Draw the line so that it follows the curvature of Frosty's head but make it dip down on the left side. The brim should be kind of wavy. Sketch lightly at first to get the shape right. Darken the initial cylindrical shape but don't overlap the brim. Make the top part wider too.
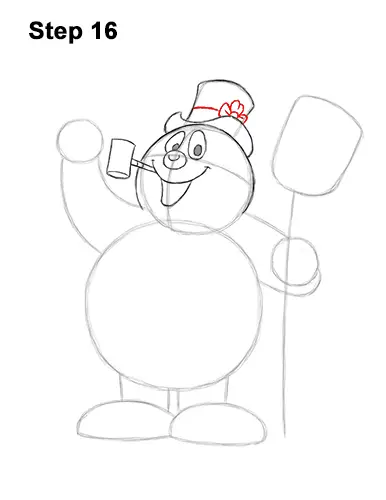
Step 16: Inside the hat, on the lower, right side draw a small flower using a series of short, curved lines. The lower half of the flower will be hidden behind the hat's brim. To the left, draw a line for the hat's band.
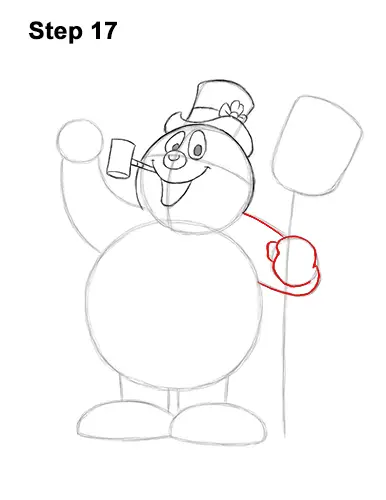
Step 17: Use the small circle on the right as a guide to draw Frosty the Snowman's first hand. Darken the edges of the circle but make the sides narrower and wavier for the clenched fist. Draw a small oval on the left side of the fist for Frosty's thumb. Darken the lines around the fist to create the shape of the arm.
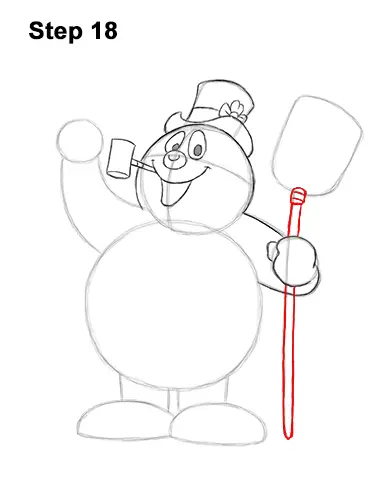
Step 18: Darken the long, vertical line for the broomstick but don't overlap Frosty's fist. Add a second line to the right to make the shape thicker. At the top, draw a series of lines for the base.
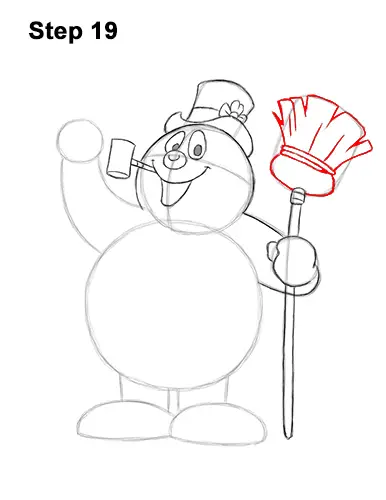
Step 19: Use the U shape at the top as a guide to draw the broom's bristles. Draw a small oval at the bottom of the initial guide for the bunched-up bristles. Draw a series of horizontal lines above the oval for the bands that hold the bristles together. Follow the path of the guide as you draw the bristles but make the shape wider. Don't draw every individual bristle. Just draw all of the bristles together as a whole. Make the shape split at the top a few times to emphasize the bristles. Add some lines inside the shape too.


