


How to Draw Snoopy Step-by-Step | Easy Drawing Tutorial
Use the super easy step-by-step instructions below to learn how to draw Snoopy. Follow along with the video, or use the images in this article. By the end of this tutorial, even beginners will have a completed drawing of Snoopy dancing!
Love drawing? Keep your artistic streak going and stay "tooned" for more free art lessons by:
- Bookmarking the EasyDrawingTutorials.com homepage for updates
- Subscribing to the EasyDrawingTutorials YouTube channel
- Visiting How2DrawAnimals.com for free animal tutorials
- Visiting How2DrawManga.com for free manga tutorials
This page contains Amazon affiliate links. If you choose to purchase through these links, I earn a small commission at no extra cost to you.
RELATED TUTORIALS
 |
 |
 |
Materials You’ll Need
Before starting, gather these basic drawing supplies:
- Pencil (an HB lead pencil is best for light sketches)
- Eraser
- Black ink pen or marker
- Drawing paper
- Colored pencils or markers
Sketch Guidelines
Building a solid initial sketch is key to getting your character's proportions right. Draw these simple shapes first before adding the details on Snoopy.
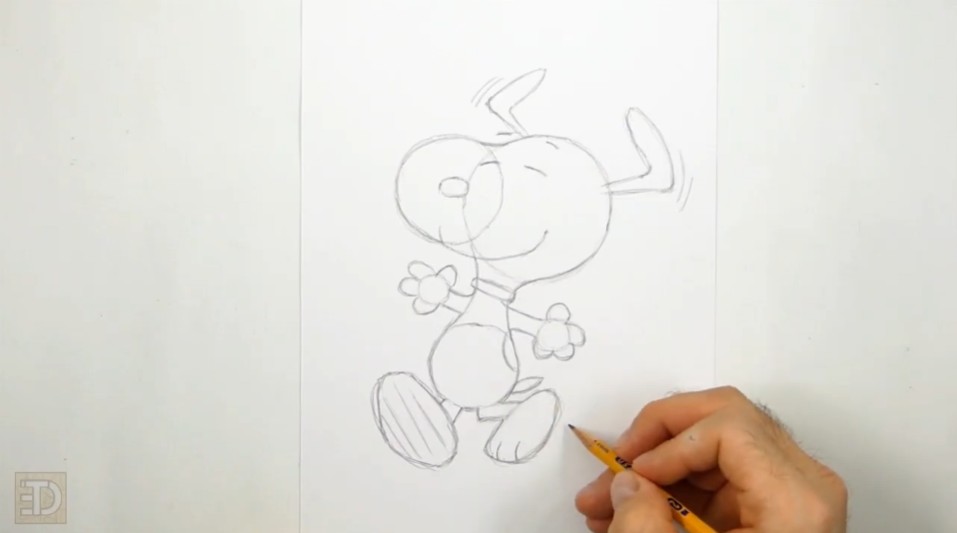
Step 1: Head and Muzzle Framework
- Draw the Head Circle: Make small marks to indicate the height and width of the circle you want to draw. Then connect the marks using curved lines. Since these are just guides, sketch lightly so it is easy to erase later on in the drawing process. You can trace the edge of a cup or lid if you have a hard time drawing circles freehand.
- Outline the Muzzle Circle: Make a small mark to the left of the head circle to set the outer edge of the snout circle. The top will align with the top of the head circle, and the bottom mark should sit about two-thirds from the top down. Connect the marks with curved lines.
Step 2: Body, Arms, and Legs
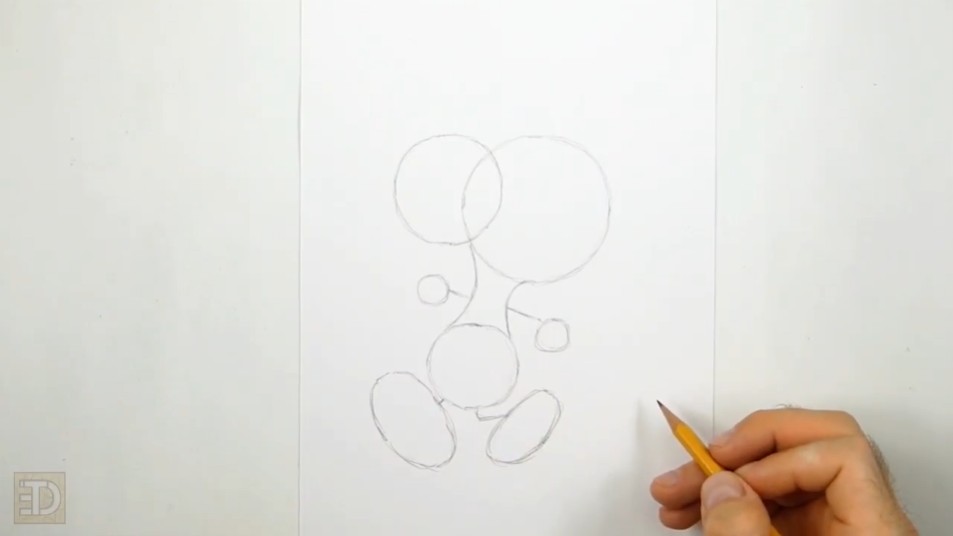
- Structure the Torso: Draw a third circle down and slightly to the left of the head, right in the section where the head and muzzle shapes meet. Don't place it too far away from the head structure.
- Link the Head and Body: Connect the head to the body using a couple of short, curved lines to create the neck. Don't make this section too wide.
- Add the Arms and Hands: Extend a short line sloping up on the left side for the arm, and draw a small circle for the hand. Repeat this process on the right side, but slope the arm line down slightly instead of up.
- Position the Feet Ovals: Draw a big oval down and to the left of the body as a guide for the first foot. Connect it to the body with a short leg line. Repeat this on the right side to create a guide for the second foot, and link it to the body with a brief leg line.
Step 3: Drawing the Happy Face
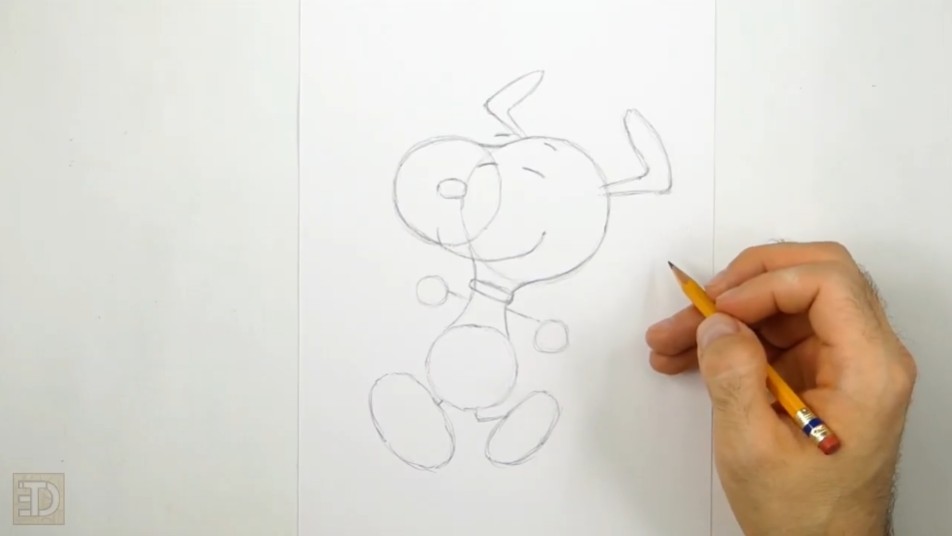
- Create the Closed Eyes: Draw a short line near the top of the head that slopes downward on the right side. Place the second eye very close to it, directly on top of the section where the initial head circles overlap.
- Add the Eyebrows: Draw two shorter lines further up for his eyebrows, making sure they are shorter than the closed eye lines. The left eyebrow will sit above the circles.
- Outline the Nose: Draw a horizontal oval inside the muzzle area, placing it close to the left edge.
- Define the Smile: Draw a long, curved line for the mouth that extends to the right, dipping below the initial circle guidelines. Sketch lightly and only darken it when the curve looks right.
- Lock in the Head Shape: Darken the outer edges of the two head circles to finish the skull structure. Connect the shapes with a short line at the top, and stop your line right where it meets the mouth at the bottom.
- Add the Collar: Draw a small rectangle or a thick line at the base of the neck for the collar. You can fill it in black or save it to color red later.
Step 4: Drawing the Flapping Ears
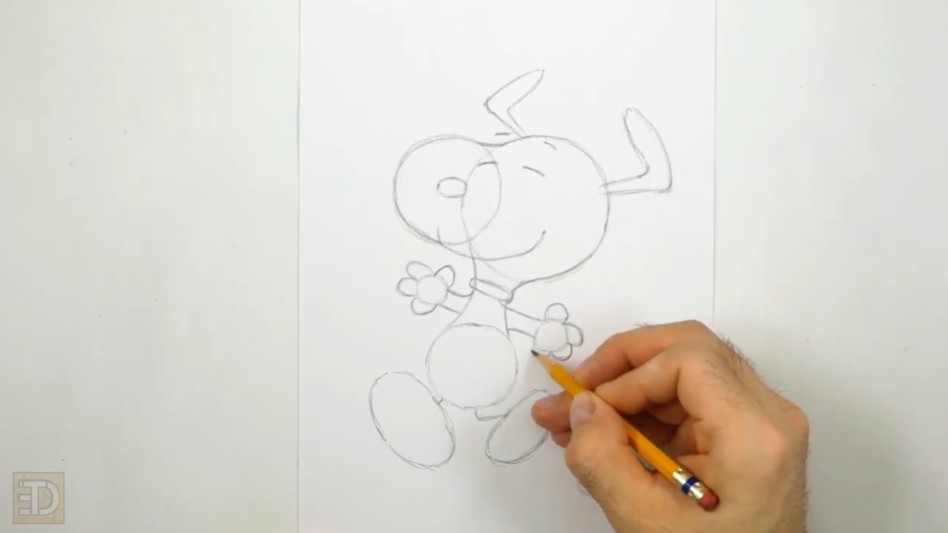
- Shape the Left Ear: Start near the top-left of the head and draw an angled line pointing up that resembles a less-than sign. Add another line to the right to make the ear thicker, rounding out the corners and tips.
- Shape the Right Ear: Start on the right side of the head and extend a line to the right, curving it up and back toward the left. Complete the ear with another angled line, keeping it proportional to the head.
The Finishing Touches
Now it's time to add the final body details, ink your work, and add color!
Step 5: Defining the Body, Limbs, and Markings
- Form the Arms and Fingers: Darken the arm guidelines and add a parallel line at the bottom to thicken them. Draw small arcs around the hand circles to create the fingers.
- Finalize the Feet: Darken the left oval guide, making it slightly pointier at the top, wider on the sides, and pointy again at the bottom. Draw a few lines inside the base to indicate the bottom pad and add shadow. Darken the right leg line and make it thicker. Trace the right foot oval, keeping the top narrower than the bottom, and add two short lines at the tip to separate his toes.
- Finish the Torso and Spot: Darken the remaining outer edges of the body framework. Draw a curved line on the upper right side of his back for his spot.
- Add the Tail: Draw two short, curved lines on the bottom right side of the body that meet at a point to form a leaf-shaped tail.
- Add Action Lines: Sketch a few quick strokes next to the ears and feet to give the character a sense of his dancing movement.
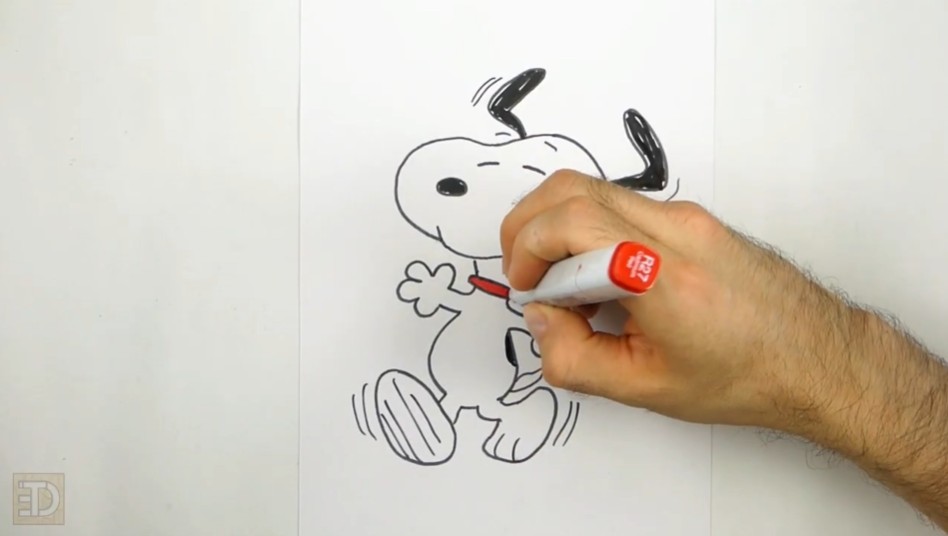
- Ink and Clean Up: Carefully trace over your final lines with a fine pen or permanent marker. Go slowly to keep the lines crisp. Let the ink dry completely, then use a soft eraser to remove all underlying pencil guidelines. You can fill the ears, back spot, and nose solid black, and color his collar red!
Final Tips for Drawing Cartoon Characters
Improving your drawing skills takes practice and patience. Keep these techniques in mind:
- Sketch lightly before committing to final lines so mistakes are easy to erase.
- Use construction shapes to maintain correct proportions across the head and body.
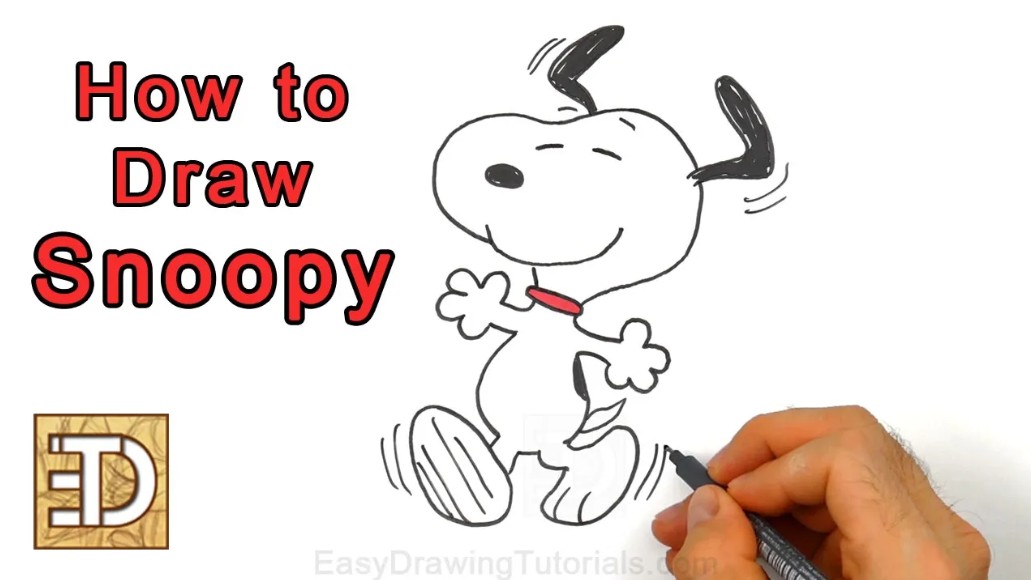
With consistent practice, drawing characters like Snoopy becomes much easier and enjoyable!
RELATED TUTORIALS
|
|
|
Thanks for visiting! Subscribe to the EasyDrawingTutorials YouTube Channel for a new tutorial every week.
To learn how to draw animals, visit How2DrawAnimals.com.