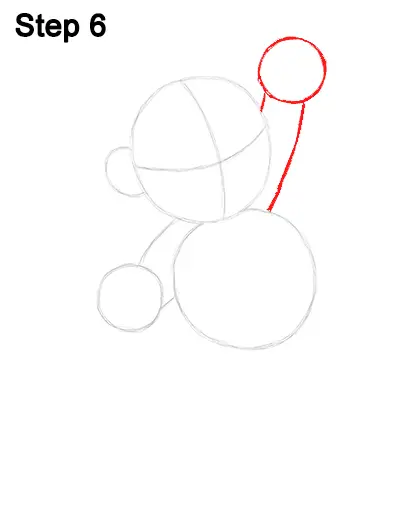
Step 6: Draw another small circle on the top, right side of the head as a guide for the other hand. This circle should be the same size as the other small one on the left side of the body. Draw two curved lines, a short one and a long one, that connect the circle to the body to form the guide for Mario's other arm.
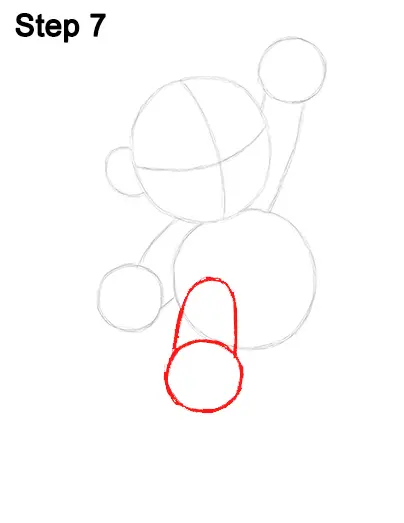
Step 7: Draw another small circle under the body on the left side as a guide for Mario's first foot. This circle should be a tiny bit bigger than the circles for the hands. Now draw an arc above the circle and inside the body, as a guide for the rest of the leg. Mark the height of the arc with a small line, then add the curved lines on the sides.
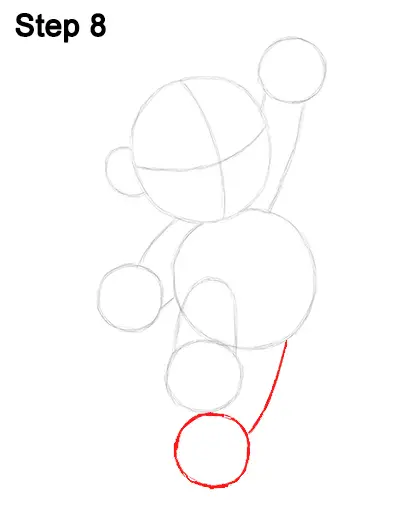
Step 8: Draw another circle under the previous one as a guide for the other foot. This circle and the previous one should be the same size. They should form a sort of 8 under the body. Draw a long line on the top, right side that connects to the body to form the guide for Mario's other leg.
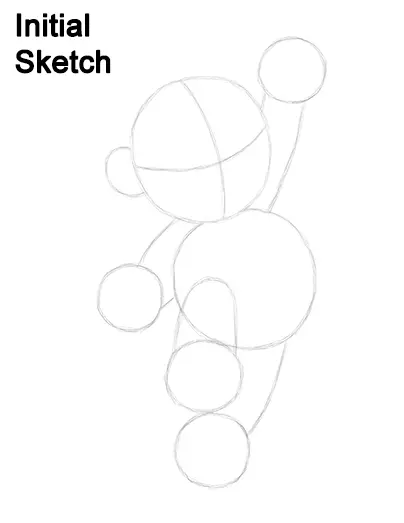
That's it for the guides! For the next steps, use darker lines for a more finished drawing.
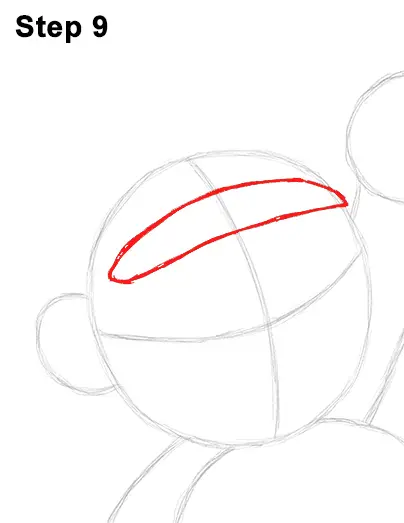
Step 9: Draw a thin, long shape near the top of the head for the bill on Mario's hat. The shape is basically made up of two long, parallel lines that are connected on the sides by small arcs. The bill should be close to the top edge of the circle. It should be slightly tilted like the horizontal construction line.


