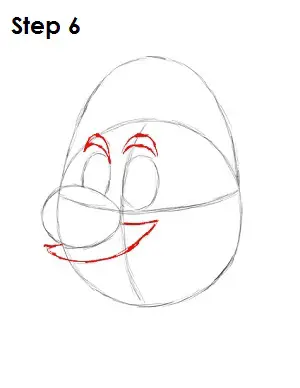
Step 6: On top of Mario's right eye, draw a crescent moon with its points pointing down. Do the same thing over Mario's left eye, except the left point of the crescent moon should touch the top right side of the left eye. These are Mario's eyebrows. Now draw a really wide curved line that starts below the horizontal construction line and extends to the outside of the main circle. With two short lines, conect the long curved line to Mario's nose. This is his moustache.
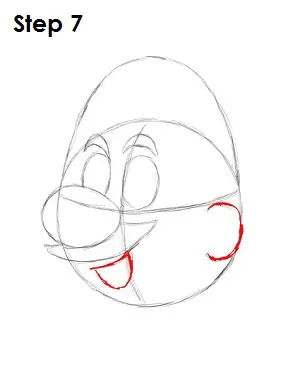
Step 7: Draw a U-shaped arc that starts where the lower part of Mario's moustache touches the vertical construction line. Make the arc slightly tilted. Now draw a bent line that connects the tops of the U together. This is Mario's mouth. At this point, draw a backward C right under the horizontal construction line, and make the backward C graze the edge of the circle. This is Mario's ear.
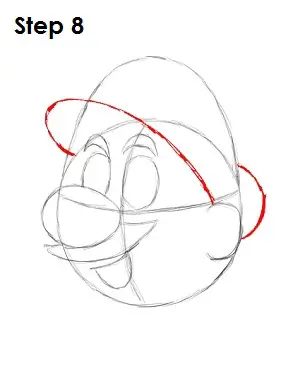
Step 8: To draw Mario's hat, you will draw two arcs. Begin at the left of his eyebrow on the construction circle. Draw the arc up and to the left, and then bring it right and curve down to where his ear begins. Now draw another arc behind his head.
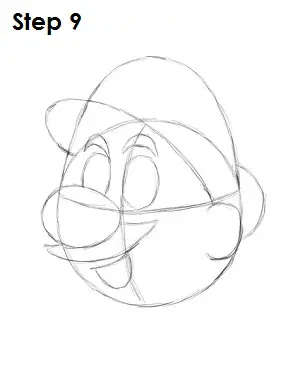
Step 9: That's it for the initial sketch of Mario from Nintendo's Mario Brothers video games! You have the basic Mario shape, and now you will go in and tighten your drawing. From this point on, press harder with your pencil in order to get darker lines and a more defined sketch.
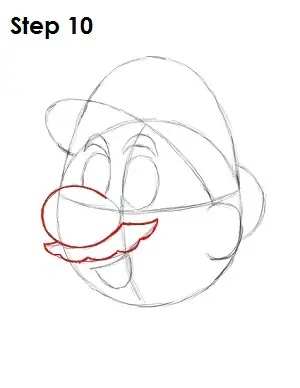
Step 10: Darken in Mario's nose except for the upper right side of it. Tighten the moustache by curling the ends and drawing curves underneath it, as well. Draw about five curves under Mario's moustache.


