




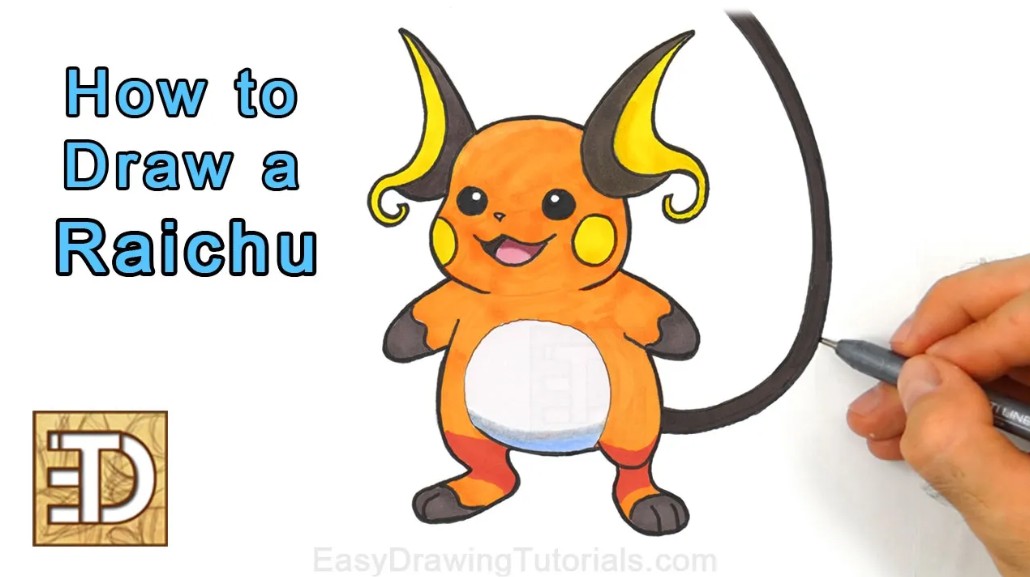
How to Draw Raichu | Step-by-Step Pokémon Drawing Tutorial
Use the super easy step-by-step instructions below to learn how to draw Raichu from Pokémon. Follow along with the video, or use the images in this article. By the end of this tutorial, even beginners will have a completed drawing of Raichu from Pokémon!
Love drawing? Keep your artistic streak going and stay "tooned" for more free art lessons by:
- Bookmarking the EasyDrawingTutorials.com homepage for updates
- Subscribing to the EasyDrawingTutorials YouTube channel
- Visiting How2DrawAnimals.com for free animal tutorials
- Visiting How2DrawManga.com for free manga tutorials
This page contains Amazon affiliate links. If you choose to purchase through these links, I earn a small commission at no extra cost to you.
RELATED TUTORIALS
 |
 |
 |
 |
 |
Materials You’ll Need
Before starting, gather these basic drawing supplies:
- Pencil (an HB lead pencil is best for light sketches)
- Eraser
- Black ink pen or marker
- Drawing paper
- Colored pencils or markers
Sketch Guidelines
Creating a solid initial sketch is key to getting your character's proportions right. Draw these simple shapes first before adding the details on Raichu.
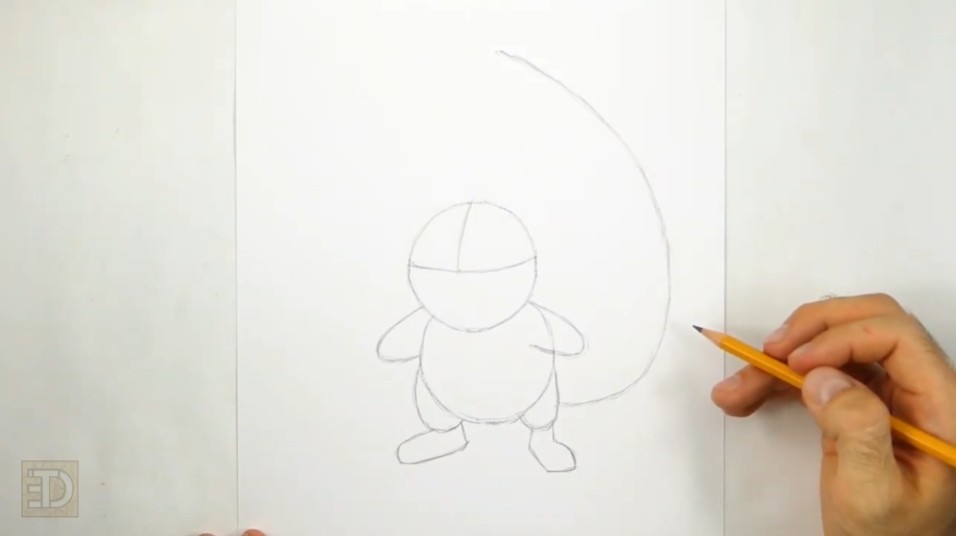
Step 1: Head and Body Framework
- Draw the Head Circle: Sketch a circle for the head. To draw the circle, first make four small marks to determine its height and width. Then connect the marks using curved lines. If you're struggling to draw a circle freehand, trace a circular object like a coin or lid.
- Add Facial Guides: Draw a curved horizontal line and a vertical line inside the head circle to help with feature placement.
- Structure the Torso: Sketch a slightly smaller circle below and to the right of the head to establish the body.
Step 2: Adding the Facial Details
- Eyes and Highlights: Place two circles on the horizontal guide, adding a small circle inside each for a highlight.
- Nose and Mouth: Draw a tiny triangle at the guide intersection. Below it, draw a "W" shaped line for the top of the mouth and a curved line for the bottom.
- Cheek Patches: Draw oval shapes on the sides of the face for Raichu's electric pouches.
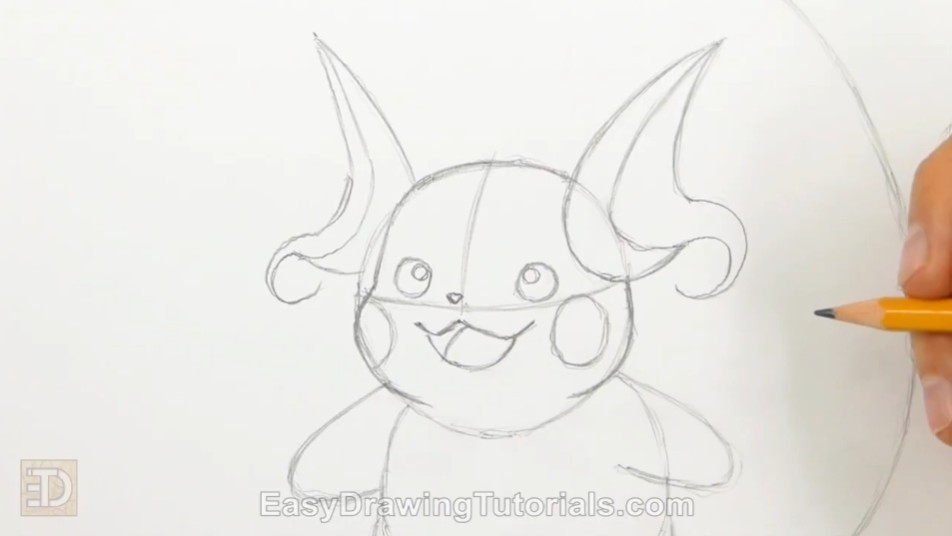
Step 3: Drawing Body and Limb Details
- Arms and Legs: Define the small arms on the sides of the body and the wider legs at the base.
- Feet and Toes: Angle the foot on the left outward and the foot on the right forward. Add small curved lines to separate the toes.
- Fur Patterns: Add wavy lines to the arms and feet to indicate the color separation in the fur.
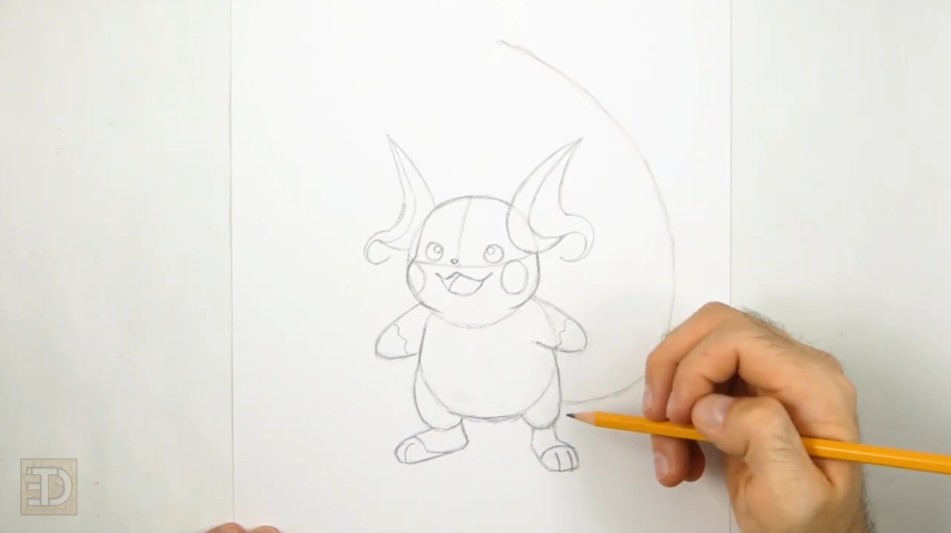
Step 4: Sketching the Tail and Stomach
- Draw the Belly Oval: Sketch a large oval in the center of the body for the white patch.
- The Lightning Tail: Add a long, thick curved line extending from the body, finishing with a large lightning-bolt shape at the tip.
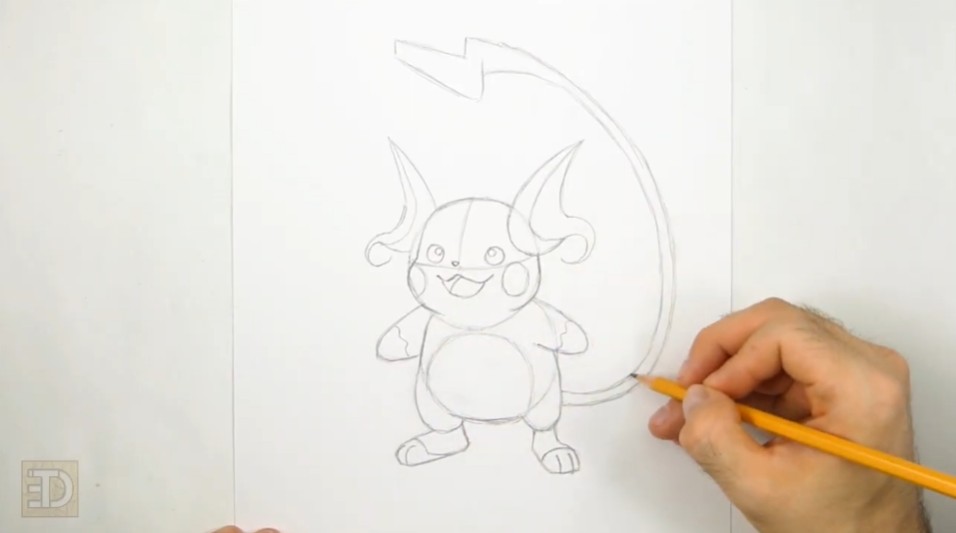
The Finishing Touches
With your sketch completed, it's time to finalize your lines in ink and add color!
Step 5: Inking the Drawing
- Carefully trace over your final pencil lines with a black pen or marker.
- Once the ink is dry, erase the original pencil guidelines to clean up the image.
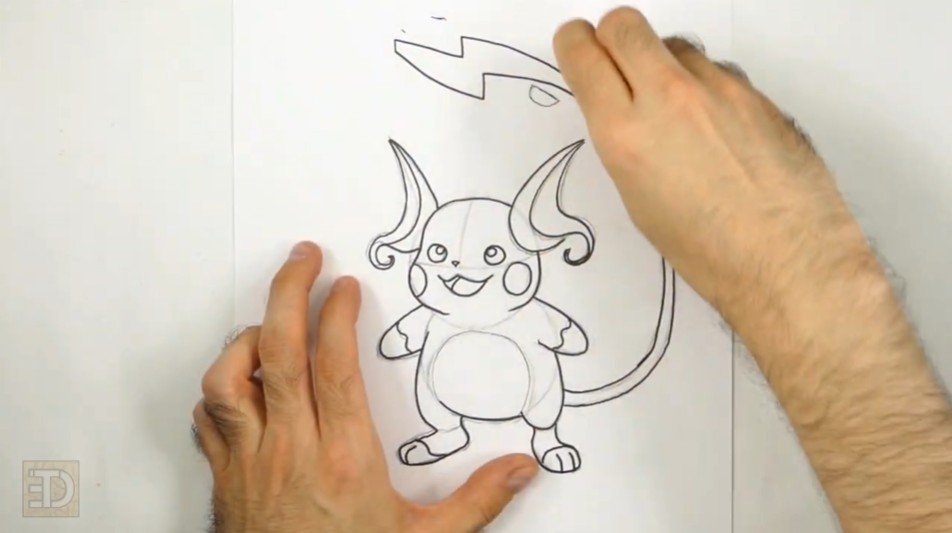
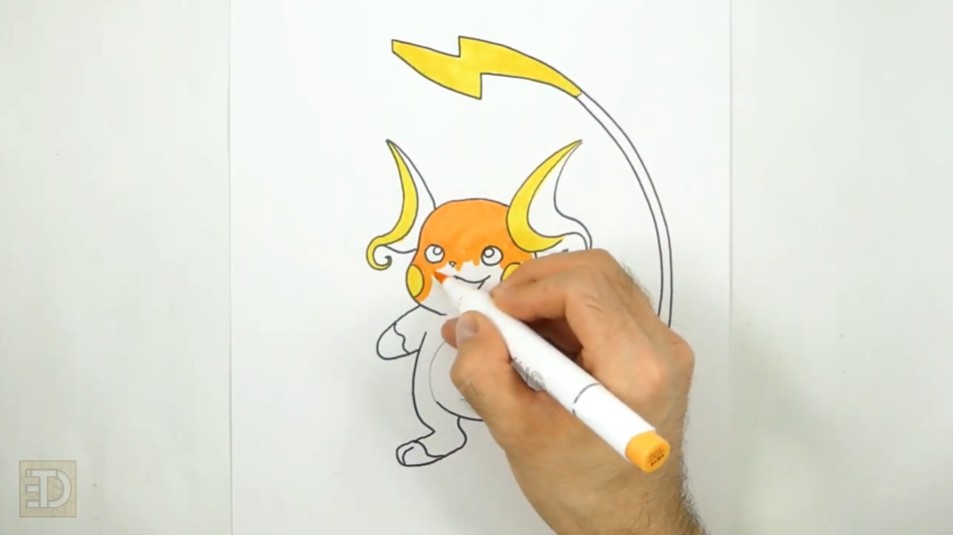
Step 6: Adding Color
- Use orange, yellow, and brown to fill in your Pokémon!
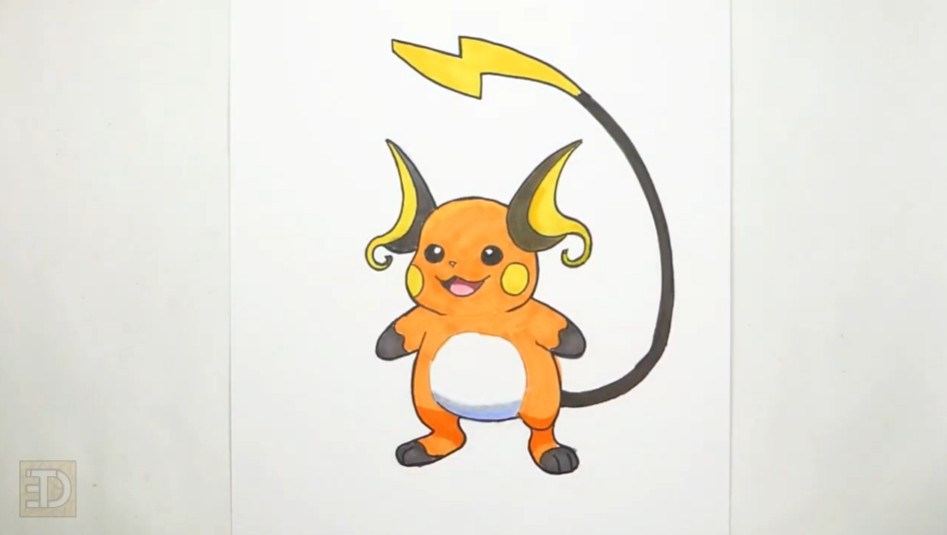
Step 7: Final Highlights
- Add any final shading or highlights to give Raichu more depth.
Final Tips for Drawing Cartoon Characters
Improving your drawing skills takes practice and patience. Keep these techniques in mind:
- Sketch lightly before committing to final lines so mistakes are easy to erase.
- Use construction shapes to maintain correct proportions across the head and body.
With consistent practice, drawing characters like Raichu from Pokémon becomes much easier and enjoyable!
RELATED TUTORIALS
|
|
|
|
|
Thanks for visiting! Subscribe to the EasyDrawingTutorials YouTube Channel for a new tutorial every week.
To learn how to draw animals, visit How2DrawAnimals.com.