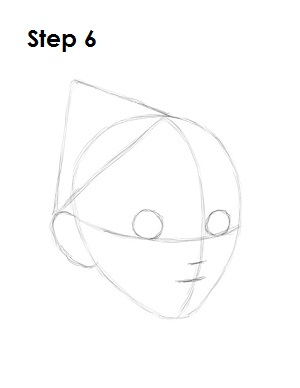
Step 6: That's it for the initial sketch of Walt Disney's Peter Pan! You have the basic Peter Pan shape, so now go in and tighten your drawing. From this point on, press harder with your pencil in order to get darker lines and a more defined sketch.
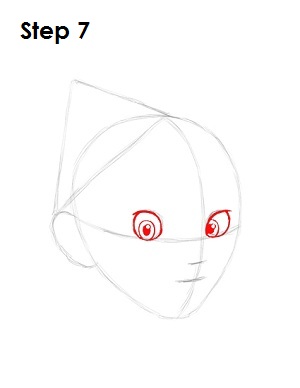
Step 7: Tighten the shape of Peter Pan's eyes by drawing the lines darker on top to simulate eyelashes. On the inside of each eye, draw in a big circle for Peter Pan's iris, a smaller circle inside of it for glare and another small one that's shaded for his pupil.
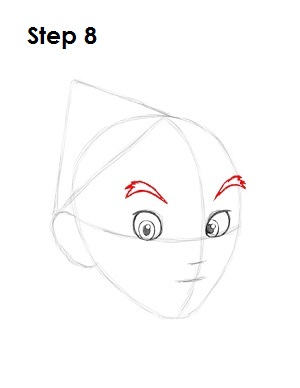
Step 8: Peter Pan has rather bushy eyebrows. Draw curved lines on top of each eye that are thicker on the outer edges. At the ends of the curves, draw jagged edges to make Peter Pan's eyebrows bushier.
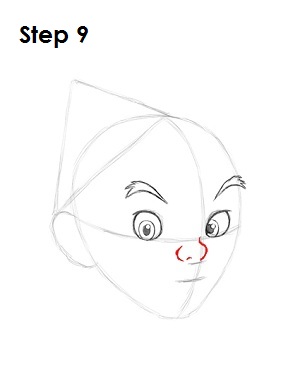
Step 9: Begin to draw Peter Pan's nose where the vertical and horizontal construction lines meet and make a distorted S shape down toward the top of the smaller construction line. To the left of the S shape, draw a small curve and a tiny line in between for this Disney cartoon character's nostril.
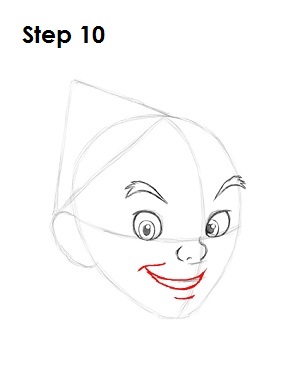
Step 10: Using the lower horizontal line as a guide, draw Peter Pan's mouth as two wide U-shaped curves that sit on top of each other and come to a point on the left side. Draw a smile line on top of that point as a wavy line. Below his smile, draw a small horizontal line for Peter Pan's lower lip.


