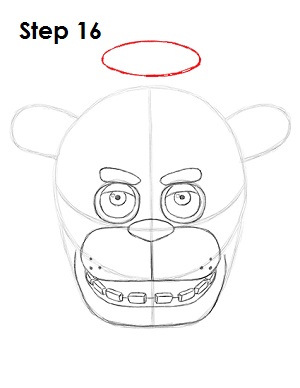
Step 16: Freddy Fazbear's top hat can be a little tricky, so it's divided into three parts. First draw the top most part of the hat as an ellipse or oval shape above the head. The top of the hat is a circle, but an ellipse is used because of perspective.
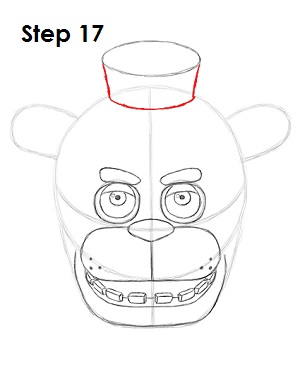
Step 17: Draw the sides of the hat using a couple of straight lines on the sides and add the bottom part as another curved line.
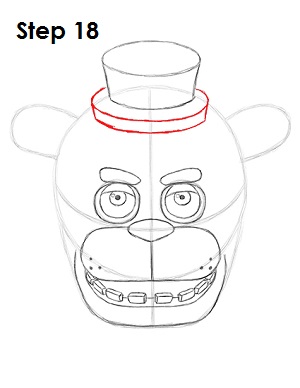
Step 18: Now draw the brim of Freddy Fazbear's hat below the shape you just drew. The first part is another ellipse that has the top part missing because it's behind the first shape. Then add another line at the bottom that has a similar curve for the bottom edge of the hat's brim.
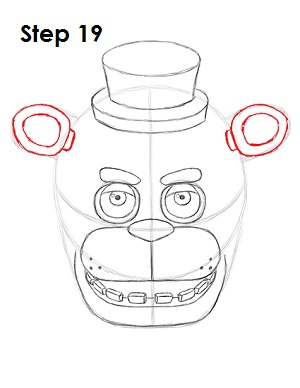
Step 19: Use the arcs on the sides as guides to draw Freddy Fazbear's ears. The bottom edge of each ear should be flat and outside of the main head shape. The ears are connected to the head with a thinner shape. Draw a shape similar to the ear within the shape of each ear for extra detail.
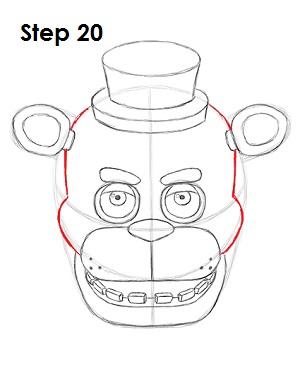
Step 20: Draw the rest of Freddy Fazbear's head using the remaining lines as guides. Follow the basic path of the guides as you darken the lines but make the top part thinner. The bottom part should bugle out more to form the cheekbones and give the head an almost skull-like appearance.


