



How to Draw a Tulip Bouquet (Step-by-Step Guide) | Easy Drawing Tutorials
Use the super easy step-by-step instructions below to learn how to draw a beautiful Tulip Bouquet. Whether drawing this for fun, or for a card or gift, just follow along with the video or use the images in this article, and by the end of this tutorial, even beginners will have a completed drawing of a Tulip Bouquet!
Love drawing? Keep your artistic streak going and stay "tooned" for more free art lessons by:
- Bookmarking the EasyDrawingTutorials.com homepage for updates
- Subscribing to the EasyDrawingTutorials YouTube channel
- Visiting How2DrawAnimals.com for free animal tutorials
- Visiting How2DrawManga.com for free manga tutorials
This page contains Amazon affiliate links. If you choose to purchase through these links, I earn a small commission at no extra cost to you.
RELATED TUTORIALS
 |
 |
 |
 |
 |
Materials You’ll Need
Before starting, gather these basic drawing supplies:
- Pencil (an HB lead pencil is best for light sketches)
- Eraser
- Black ink pen or marker
- Drawing paper
- Colored pencils or markers
Sketch Guidelines
Building a solid initial sketch is key to getting your bouquet's proportions right. Draw these simple shapes first before adding the details to your tulips.
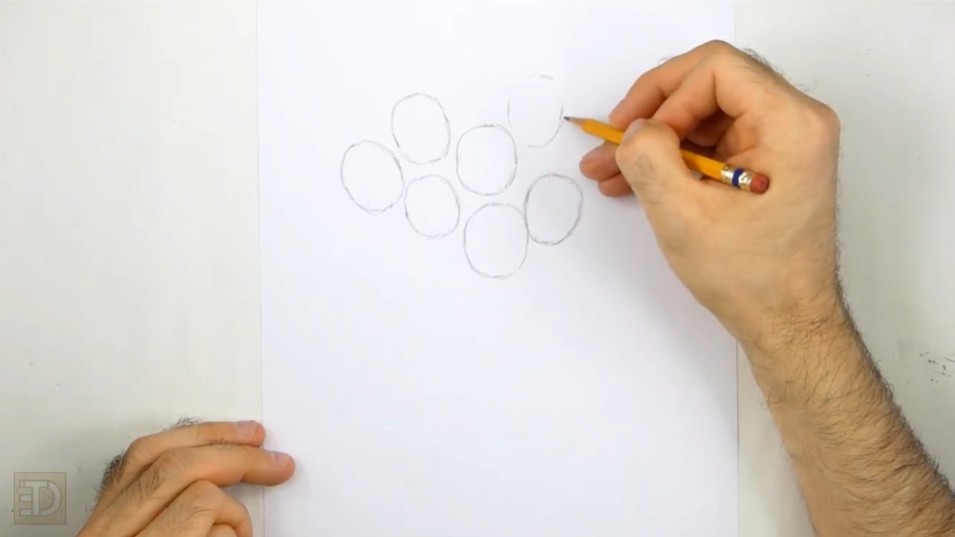
Step 1: Sketch the First Tulip Base
- Draw the Main Oval: Start by drawing a small oval for the main part of the first tulip.
- Set the Height and Width: Make two small marks to indicate the height, and two marks on the sides for the width. Keep the height longer than the width.
- Connect the Marks: Connect these small marks using curved lines to form the complete oval shape.
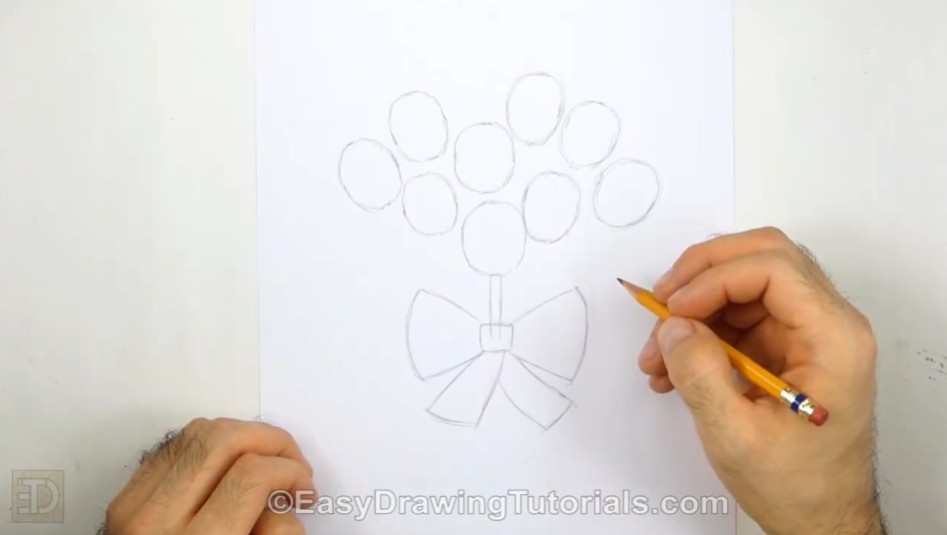
Step 2: Build the Bouquet Shape
- Add More Ovals: Draw another oval of the same size right above the first one using the same technique. Continue adding ovals to build a cluster. Nine ovals work perfectly for a full bouquet.
- Tilt the Flowers: Tilt some of the ovals slightly so they do not all stand perfectly straight up and down.
- Overlap the Edges: Allow the edges of the ovals to touch. They do not need to be spaced evenly. Slight variations make the design look more natural.
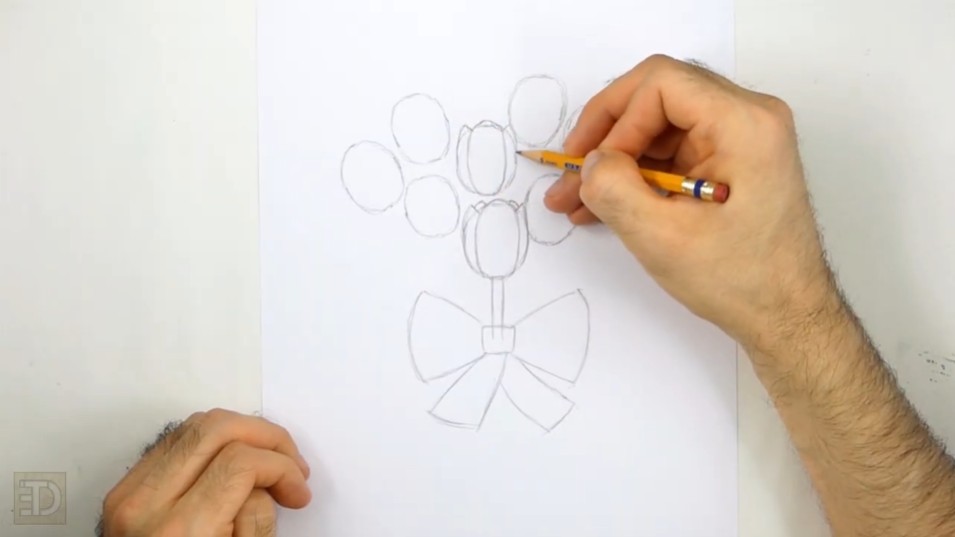
Step 3: Draw the Bow Guidelines
- Draw the Knot: Below your flower cluster, draw a small square-like shape to represent the knot of the bow holding the bouquet together.
- Form the Bow Loops: Draw a couple of sloping lines on the left side to create a large triangular shape, closing it off with a curved vertical line. Repeat this on the right side.
- Add the Ribbon Tails: Below the knot, draw two rectangular shapes using sloping lines for the ribbon tails, closing them off with shorter lines at the bottom.
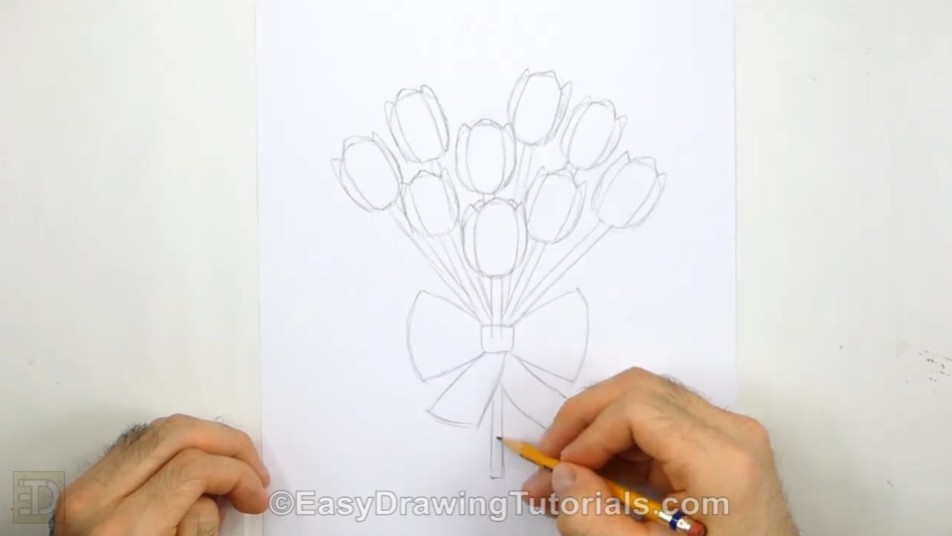
Step 4: Detail the Petals and Stems
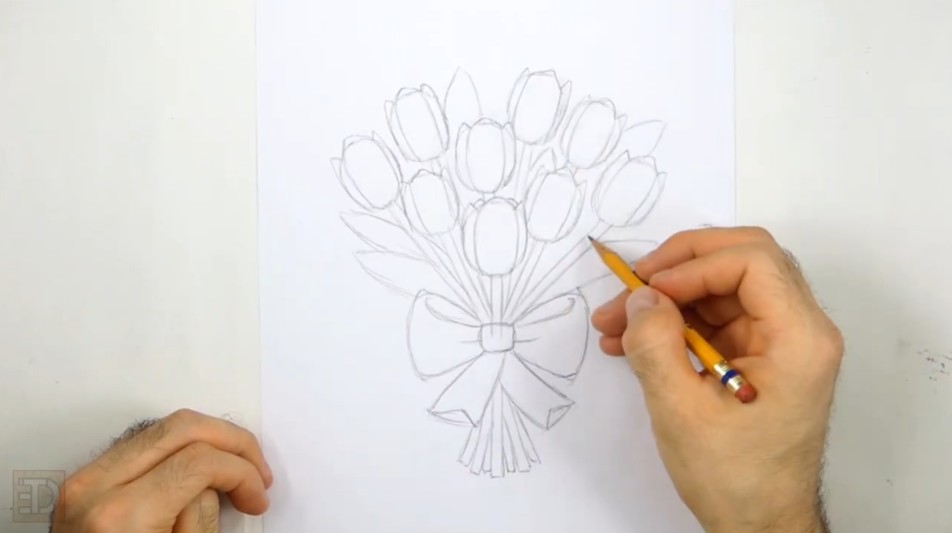
- Draw the Central Petals: Inside each oval, draw a couple of curved lines along the middle section to form the central petal. Make your petals wide, and close off the top of each with a slightly pointed line.
- Add Overlapping Petals: Draw shorter, pointed lines on each side to represent additional overlapping petals. Darken the outer edges to finalize the tulip heads.
- Sketch the Stems: Draw long, thin rectangular lines descending from the base of each tulip down toward the center knot of the bow. Draw a few stem lines emerging below the bow.
The Finishing Touches
Now it's time to add the final details and add color your bouquet of flowers!
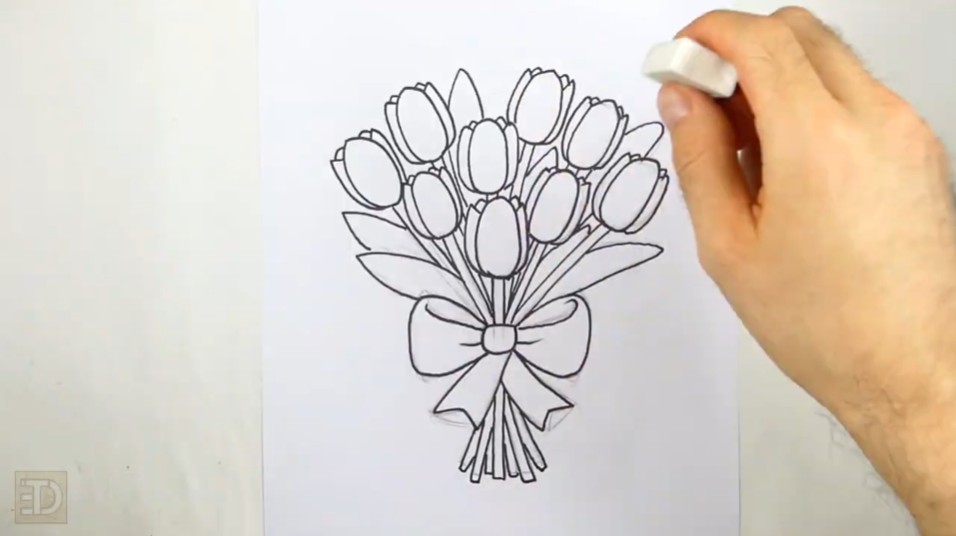
- Refine the Bow and Ribbon: Make the sides of the bow loops slightly rounder than your initial guidelines. Make a triangular notch in the bottom of each ribbon tail, and add a few short, curved lines at the top of the loops for fabric creases.
- Draw the Leaves: Draw large, distinct, curved shapes emerging from the sides and the middle of the bouquet. Place these leaves in the empty spaces without overlapping the flowers or the bow.
- Ink the Drawing: Carefully trace over your final drawing with permanent ink. Erase all of your initial pencil guidelines after the ink is dry
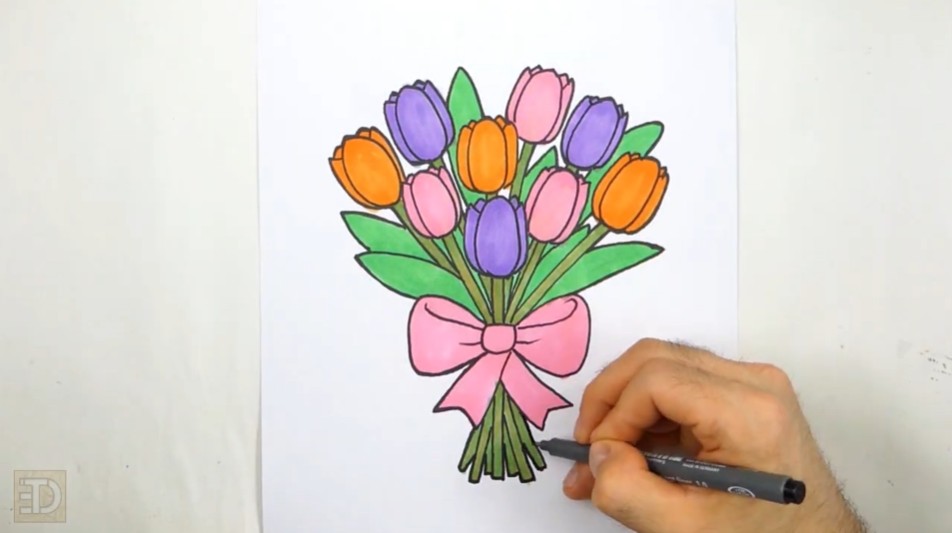
- Add Color: Finally, color your beautiful flower arrangement with purple, orange, pink, and green!
Final Tips for Drawing Floral Arrangements
Improving your drawing skills takes practice and patience. Keep these techniques in mind:
- Sketch lightly before committing to final lines so mistakes are easy to erase.
- Use construction shapes to maintain correct proportions across the flowers, stems, and ribbon.
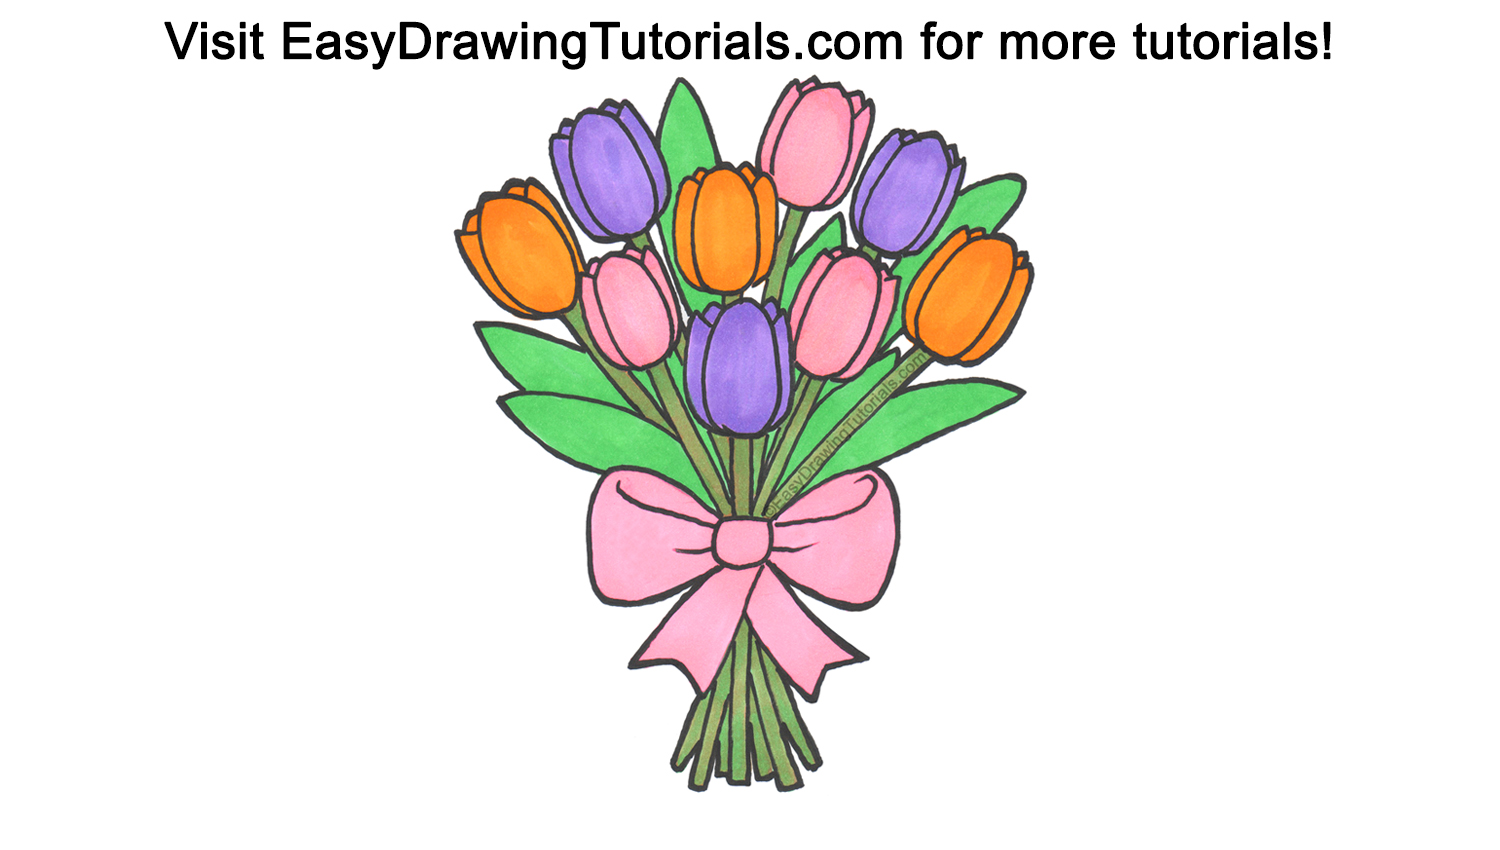
With consistent practice, drawing beautiful arrangements like this Tulip Bouquet becomes much easier and highly enjoyable!
RELATED TUTORIALS
|
|
|
|
|
Thanks for visiting! Subscribe to the EasyDrawingTutorials YouTube Channel for a new tutorial every week.
To learn how to draw animals, visit How2DrawAnimals.com.