How to Draw Shrek
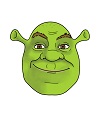
Use the video and step-by-step drawing instructions below to learn how to draw Shrek. A new cartoon drawing tutorial is uploaded every week, so stay tooned!
Intro: Start off with a pencil sketch. In the beginning stages, don’t press down too hard. Use light, smooth strokes for sketching.
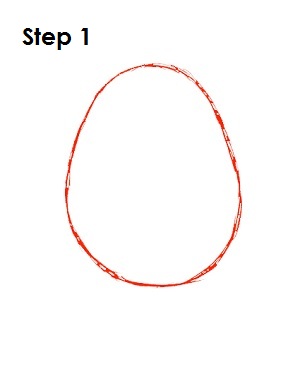
Step 1: Start by drawing a shape similar to an egg in the middle of the page. The shape doesn’t have to be perfect. It’s only a guide for Shrek’s head.
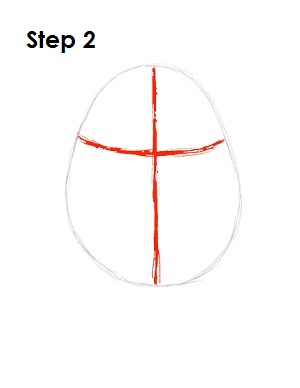
Step 2: Next, draw two intersecting lines across the egg shape, one vertical and one horizontal. These are construction lines that will help you place Shrek’s facial features later on.
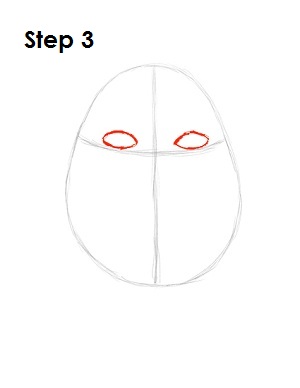
Step 3: For Shrek's eyes, draw two football shapes that sit on top of the horizontal line and on either side of the vertical line.
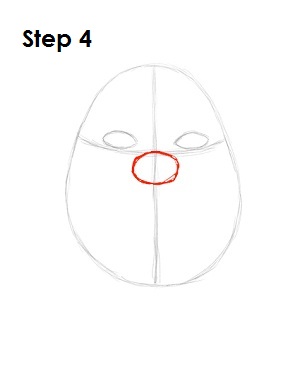
Step 4: Below the section where the two construction lines intersect, draw an oval as a guide for Shrek's nose.
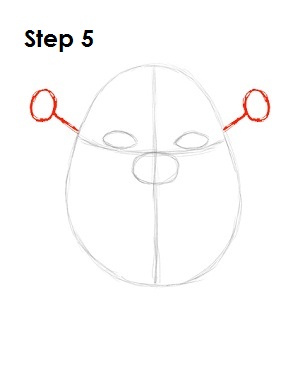
Step 5: On either side of Shrek's head, near the ends of the horizontal construction line, draw a diagonal line. At the end of each line, draw a small circle. These are guides for this ogre's ears.
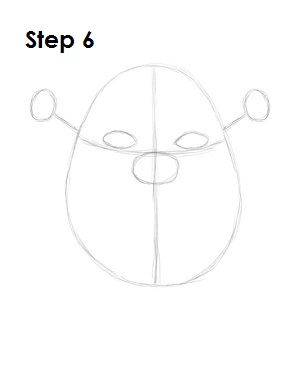
Step 6: That’s it for the initial sketch! You have the basic Shrek shape, so now go in and tighten your drawing. From this point on, press harder with your pencil in order to get darker lines and a more defined sketch.
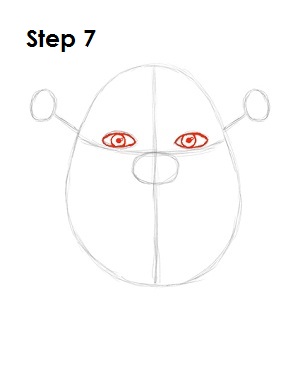
Step 7: Darken the shape of Shrek's eyes and make the top part on each eye thicker to represent eyelashes. Inside each eye, draw a circle for his iris, a shaded circle for his pupil and a smaller circle on the sides to represent glare.
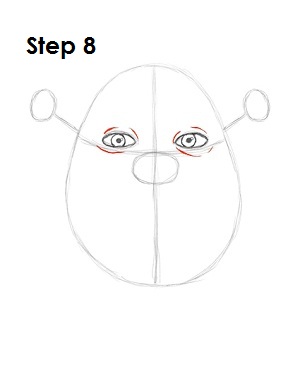
Step 8: Draw a few lines around Shrek's eyes for extra detail. Because Shrek is an ogre, his skin shouldn’t be perfect.
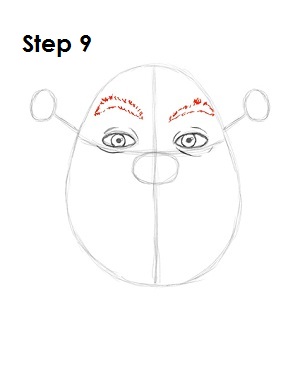
Step 9: Above each eye, draw Shrek's thick eyebrows. Draw each eyebrow as an arc, using quick, short strokes to represent the hair.
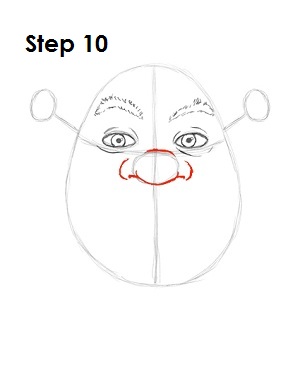
Step 10: Draw Shrek's nose using the initial oval as a guide. Darken the top and the bottom of the oval and draw extra curved lines on the side of the oval for his nostrils.
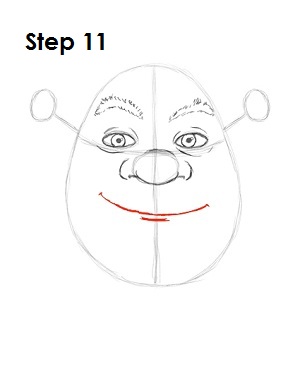
Step 11: About halfway between Shrek's nose and the bottom part of the original egg shape, draw his ogre mouth. His mouth is simply a long curved line with a smaller curved line underneath for his lower lip.
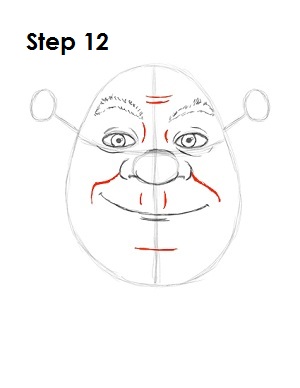
Step 12: Again, Shrek is an ogre, so draw a few lines for wrinkles and extra detail all over his face so he won’t look so smooth.
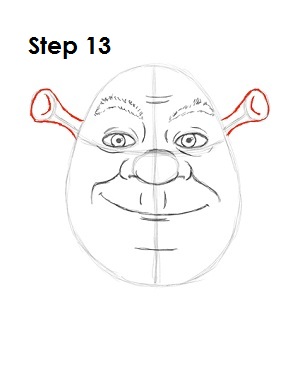
Step 13: Use the initial shapes as guides to draw Shrek's ears. Just draw around the outer part of the circles and thicken up the lines to make the base.
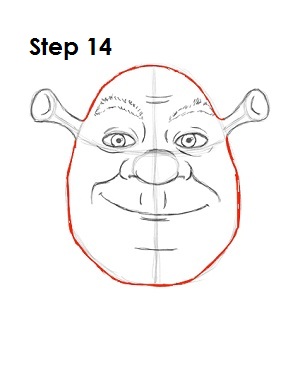
Step 14: Use the initial egg shape as a guide to draw the rest of Shrek's head. The top part of his head is smooth, but make the lower part a big more angular to emphasize his cheekbones, jaw line and chin.
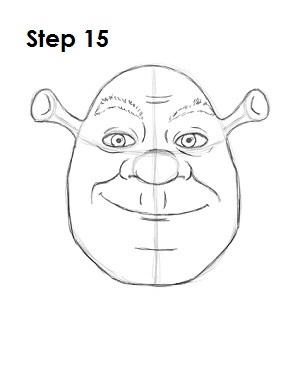
Step 15: That’s it! You now have a nice sketch of Shrek. You can stop at this quick drawing for a rough, sketchy look or go for a more finished look by continuing to the step below.
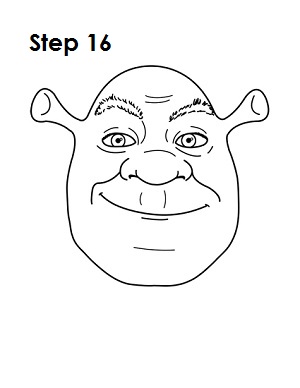
Step 16: For a more finished, inked look, carefully go over the final sketch lines with a pen or marker. Wait for the ink to dry, and then get rid of every pencil mark with an eraser. You now have a finished inked drawing of Shrek! You can stop here or go to the final step to complete your Shrek drawing.
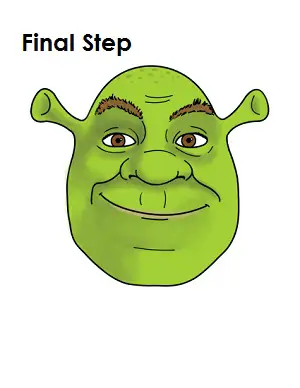
Final Step: For a completely finished Shrek drawing, you have to color it. Shrek is mainly green with a slight pink color to his lips. His eyes and eyebrows are brown, and he has a few brown spots on his head too. If you’d like, you can lightly add a darker green or gray around his eyes, ears, under his nose and on parts of his head for extra detail. That’s it! You now have a completed drawing of Shrek.


